Adding fields to an entity
Fields are mapped to columns in databases. They can also be displayed in screen sections and therefore in the web application. There are several types of fields. In this tutorial, you will learn how to add different types of fields to your entity.
Database Field
-
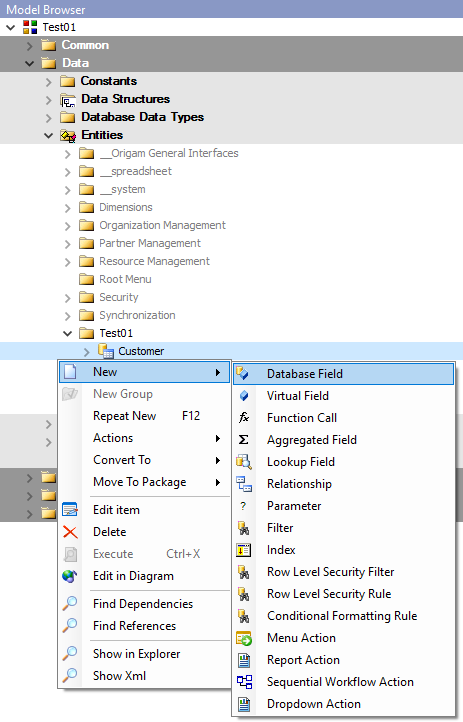
Database fields are mapped to physical database columns. Open your project in the Model Browser view and expand Data > Entities > YourProjectName. Now you can see all entities in your project. Right-click on the entity to which you want to add a field and select New > Database Field. You can also reach the menu when you open the entity by double-clicking or right-clicking and selecting the Edit item.
-
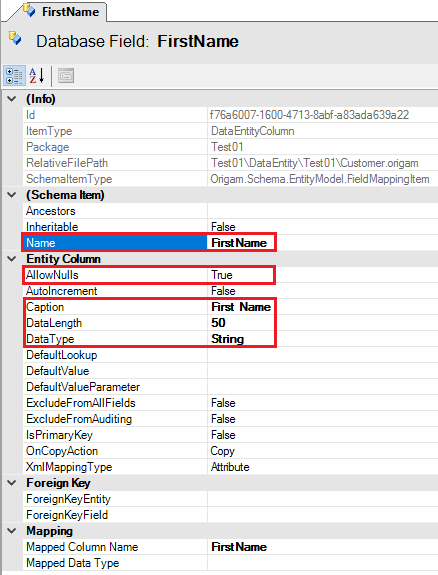
Now you can fill in the field attributes. The field is referenced in the model by Name (remember to keep with the naming conventions). The caption is used as a description for users on screens in the web application. AllowsNulls attribute is a default set to True (the field can remain empty).
Note that when you set a field as AllowsNulls=
False, the field name in the Model Browser is in bold letters. -
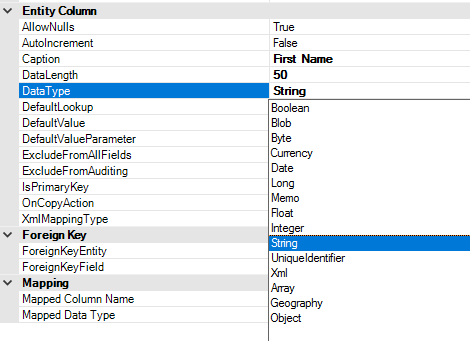
Another important attribute is DataType. If you select String, don’t forget to also fill the DataLength field. After filling in all desired attributes, save the changes.
Virtual Field
Virtual field has the same attributes as the database field, but it is not mapped to a physical database field. The steps are the same as when creating a database field, only in the first step select New > Virtual Field.
Function Call Field
-
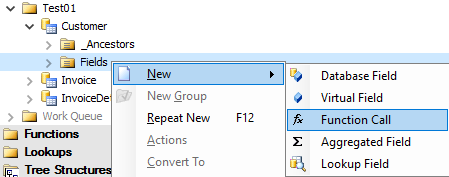
Another type of field you can choose is the function call field. You can follow the first step as when creating a database field, only in the first step select New > Function Call. But once you have added a field to your entity, a new subfolder Fields will appear. You can also add new fields by right-clicking on Fields > New > Function Call.
-
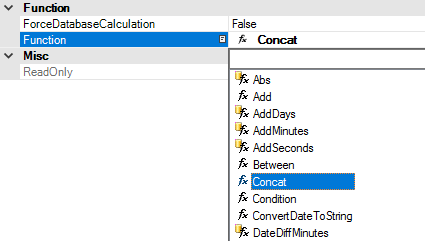
Repeating steps 2 and 3 from creating a database field fill in the relevant attributes. Then from the drop-down list select the needed Function and save.
-
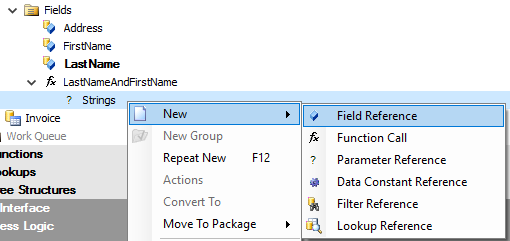
Depending on the function you have chosen, function parameters will appear in the Model Browser under the element and you must pass some values to them. In the case of the Concat Function, you have to add some strings for the function to concatenate. Right-click on Strings and select New > Field Reference.
-
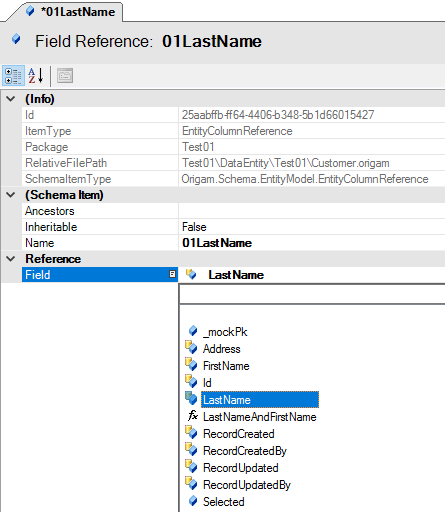
Fill in the Name of the element. Remember that the fields are concatenated in alphabetical order, so choose the names according to the desired order. Select the Field that will be used as a reference and save. Repeat steps 3 and 4 for all fields you want to include in the concatenation.
Aggregated Field
-
Another field type - the aggregated field - creates a calculated field using an aggregate function (Count, Sum, Average, Minimum and Maximum). First, you must create a relation to the entity that contains the fields you want to summarize. Right-click on the entity that will contain the aggregated field and select New > Relationship.
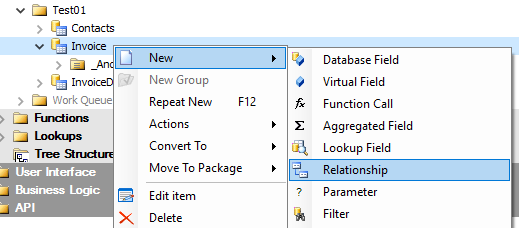
-
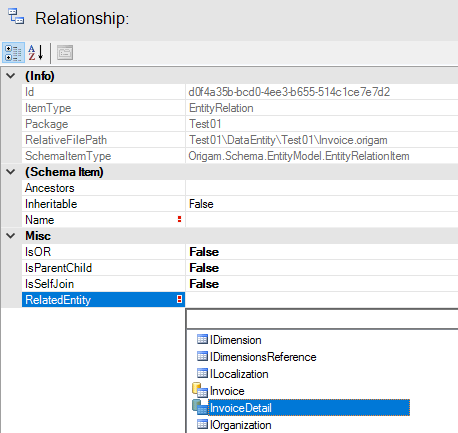
From the drop-down list select the RelatedEntity. The field Name will be automatically filled with the name of the related entity, but you can change it.
-
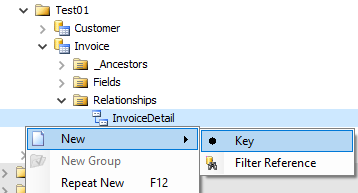
After saving you have to add a Relationship Key. Right-click on the relationship and select New > Key.
-
The model editor will open. The field Name will be automatically filled with the name of the related entity, but you can change it. As the BaseEntityField select
Idand as the RelatedEntityField select the corresponding field from the related entity, i.e. a foreign key in the related entity that is linked to the Id of the base entity (you can find a step by step tutorial for creating a foreign key here). Save.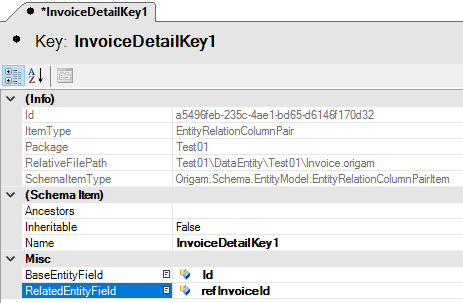
-
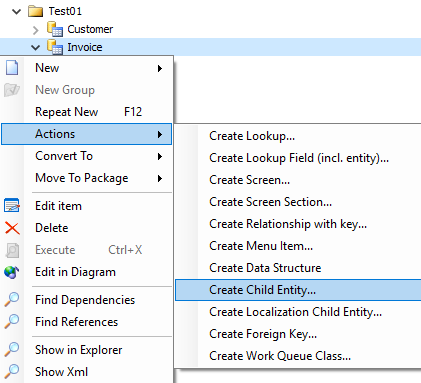
In case you don’t already have two entities (and database tables) but only one, you can also use the Create child entity wizard. Right-click on the name of the parent entity and select Actions > Create Child Entity.
-
Fill in the Child Entity Name for the new child entity. The Master Entity is already filled. There is also an option to add another parent entity. Click on OK.

-
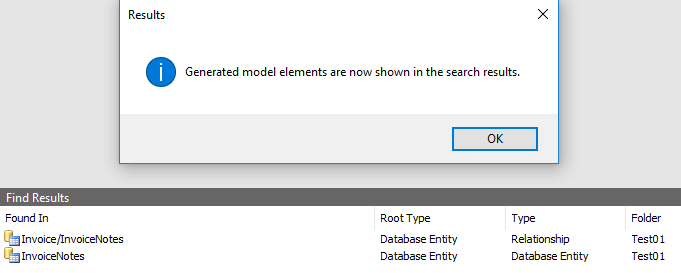
The wizard will finish all steps for you - it will create a new entity with a foreign key, a relationship between the entities and also an index for the child entity.
-
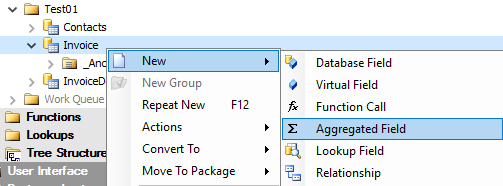
Now that you have two entities in a relationship, you can finally create the aggregated field. Right-click on your entity that will contain the aggregated field and select New > Aggregated Field.
-
The model editor will open. From a drop-down list select the AggregationType. Then select the Relation from a drop-down list - this is the entity you have created the relationship to. Then from a drop-down list select the Field whose values will be aggregated. The Name will be filled automatically, but you can change it. The attributes Caption, DataLength and DataType will be inherited from the selected Field. Save.
-
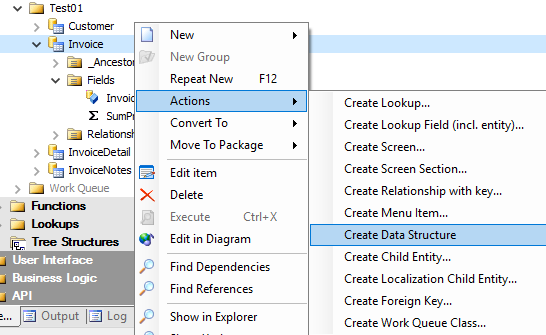
You have finished creating the aggregated field. One last task remains if you want the field to recalculate automatically with every change in the detailed data. You have to add the related entity as a child entity to the master entity’s data structure. If you don’t have one yet, go to Entities and right-click on the entity’s name and select Actions > Create Data Structure and it will be generated.
-
Expand Data Structures in the Data Model in the Model Browser. Then expand the folder of your project and find the data structure of your master entity. Expand it and then again expand the subfolder Entities. Right-click on the entity and select New > Entity.
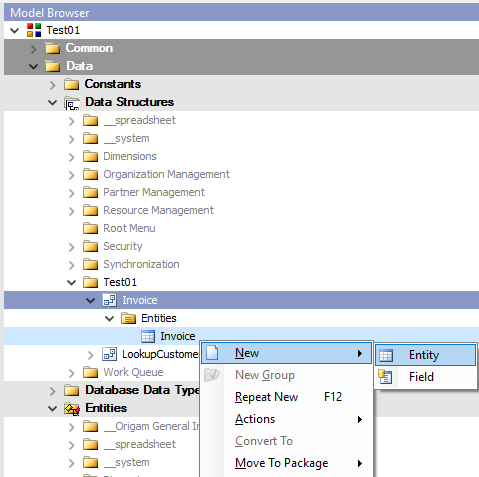
-
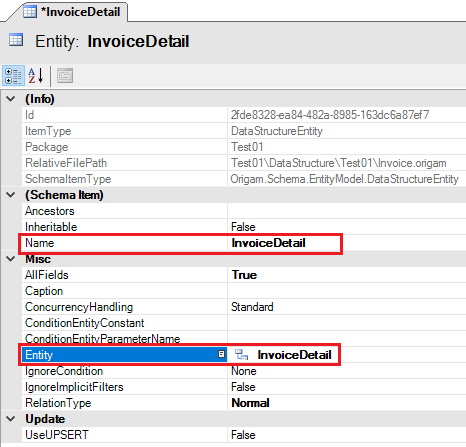
In the new tab find the attribute Entity and from a drop-down list select your child entity. The Name will be filled automatically. Save and you have completed the process of creating an aggregated field.

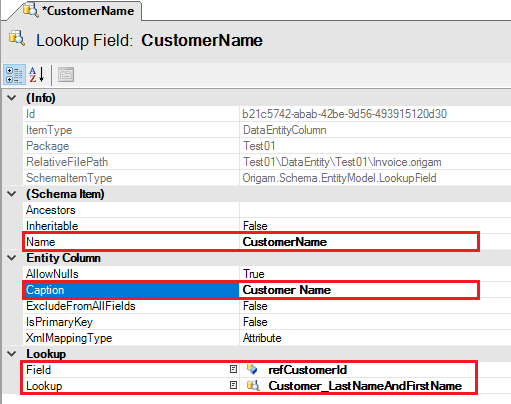
Lookup Field
-
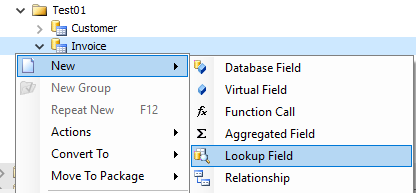
A lookup field is used to display values from another entity using a lookup. First, you must create a lookup for the entity that contains the field with values you want to display. You can find a step-by-step tutorial on how to create a lookup here. Then you will also need a foreign key to that entity. A detailed tutorial is here. Now to create the lookup field right-click on the entity where you want the field placed and select New > Lookup Field.
-
The model editor will open. Fill in the Name of the field and the Caption (a name shown in the user interface). From a drop-down list select as the Field the foreign key pointing to the entity with the looked-up values. Finally, as the Lookup select your lookup from a drop-down list. Save and the lookup field will appear in your entity.