1. Check Settings
Make sure these parameters are set in your AsapSettings.config file:
<LoadExternalWorkQueues>true</LoadExternalWorkQueues>
<ExternalWorkQueueCheckPeriod>180</ExternalWorkQueueCheckPeriod>
Set up the ExternalWorkQUeueCheckPeriod to any number of seconds you want the files to be checked.
2. Create a Queue Command in Architect
Files will be available in a work queue that we will configure later. When files are in the queue we need to process them. This is done using Work Queue Commands. Work Queue Command is a button in a work queue that, when pressed, will execute a workflow, passing the selected queue entries.
2.1. Create a Workflow
First, create a processing workflow.
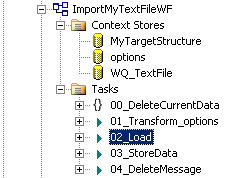
What you need to do is to create a context store WQ_TextFile. This context will contain work queue entries selected by the user.
Note
The WQ_TextFile context can contain more than one entry in case you allow the user to select multiple entries.
To get to the actual text you need to use the XPath /ROOT/WorkQueueEntry/Data.
The way how you process the file is up to you. You can parse it using XSLT transformation or you can use the FileService.ReadTextFile method to automatically parse CSV files.
2.2 Create a Work Queue Command
Now you can connect the processing workflow to the work queue class.
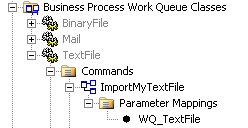
- Right-click on TextFile work queue class and choose New > Workflow Command
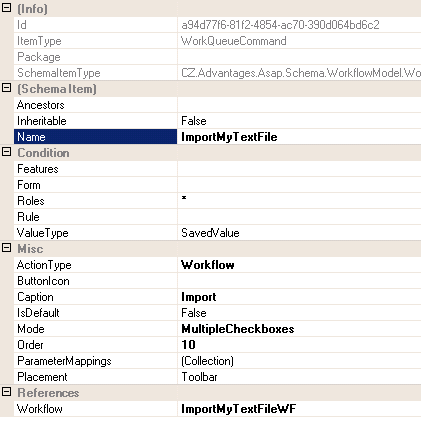
- Specify the following properties
You should specify Mode=MultipleCheckboxes so the user can select more files and process them at once.
The Name property will be used to identify the command later in the work queue configuration. - Save the command.
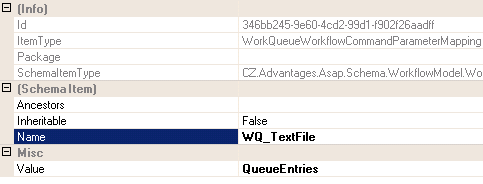
- Now right-click on the new command and choose New > Parameter Mapping (with the dot, not a question mark).
- Specify the following properties:
This way you pass the selected work queue entries to your processing workflow.
3. Set Up a Work Queue
In Client, set up a work queue using a TextFile work queue class.
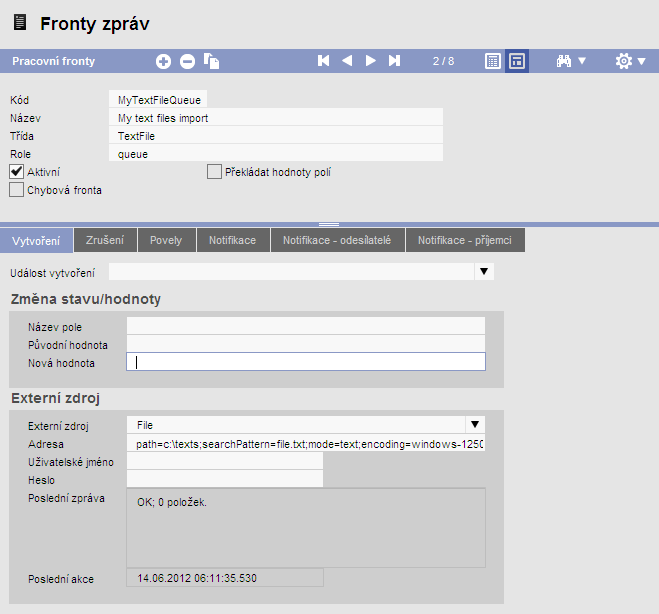
Use path parameter to specify the folder in which the files are contained, searchPattern to specify the file name and encoding to indicate the code page of the text being imported.
After you save the work queue definition and set it to Active the files will start to be imported immediately´
4. Set Up a Work Queue Command
Now we need to assign the processing commands to this queue. As the TextFile work queue class can have multiple commands defined (for different work queues), each work queue has to have some of the commands assigned. This is done on the Commands tab.

Typically you create two commands. One for import, the second for manually deleting the file from the queue.
| Field | Description |
|---|---|
| Order | Order in which buttons will be ordered in the toolbar. |
| Text | Button label. |
| Command | Name of the command specified in Architect. |
| Error Queue | Another work queue you can create where entries that produced errors while automatically processed will be moved. The target queue has to be of the same type (TextFile) as the main queue. See Process Automatically field. |
| Process Automatically | If checked, the command will be executed automatically immediately after the file gets imported to the queue. No user action is needed. If the processing fails, the entry is marked as an error (turns red in the queue list). If an Error Queue is specified, the file is moved to the error queue. |