This article demonstrates workflow tracing in ORIGAM.
There are two types of workflows — sequential workflows and state workflows, however just the sequential workflows can be traced.
A simple sequential workflow may consist of just a few steps and can be easy to follow. When working with more complex workflows containing many steps, data transformations, conditions, and similar logic, a proper tracing tool can be very useful.
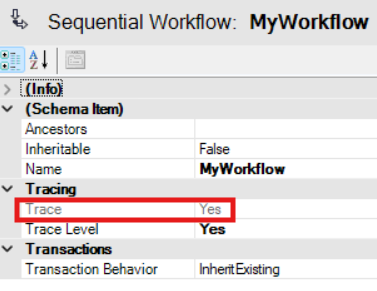
You can trace workflows that are executed directly in the Architect as well as workflows run in the client application. In both cases the tracing in the workflow properties needs to be turned on (Trace value is Yes).
To achieve that you need to set the Trace Level to Yes or InheritFromParent (in that case the tracing value is inherited from the parent, when one workflow calls another):
The Trace Tool
The tracing tool can be found in the main menu of the ORIGAM Architect: Tools / Show Trace.
The Workflow Trace screen consists of two sections. In the upper section, you can see all executions of all traced workflows, including execution time and the name of the user who ran them. The lower section shows the details of the selected run – all the steps:
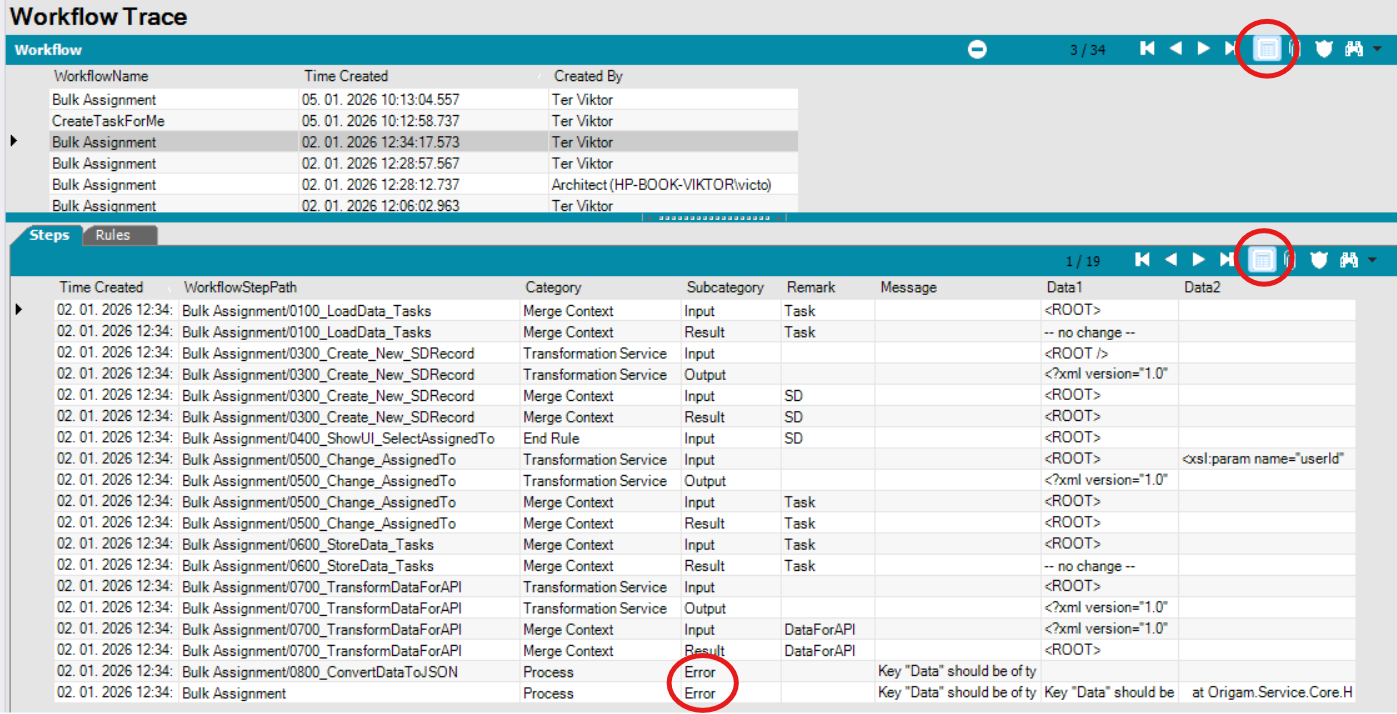
For workflow selection in the upper section, it is useful to switch to the list view as shown in the picture. Otherwise, you would need to browse the workflows one by one.
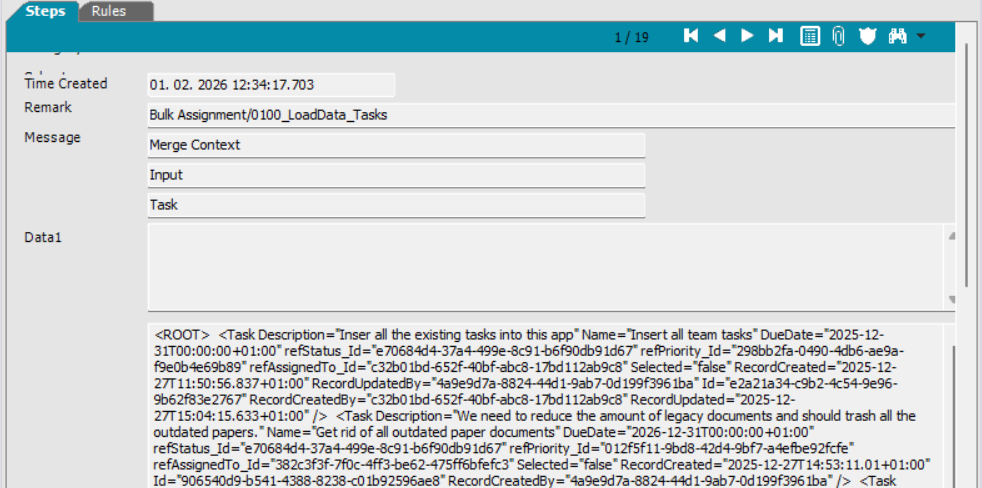
In the workflow step examiner below, you can also switch between a list view, where all workflow steps are visible, and a detail view, where you can inspect input and output data, for example:
Notes:
- In the workflow list in the first picture, in the upper section under Created By, you can see where the workflow was executed — either in the client application (username) or directly in the Architect (the Architect user is created when starting a new project).
- In the workflow step list in the first picture, note the Subcategory column. This is useful for identifying the first step that ended with an error, which is typically the main point of interest when troubleshooting a workflow.
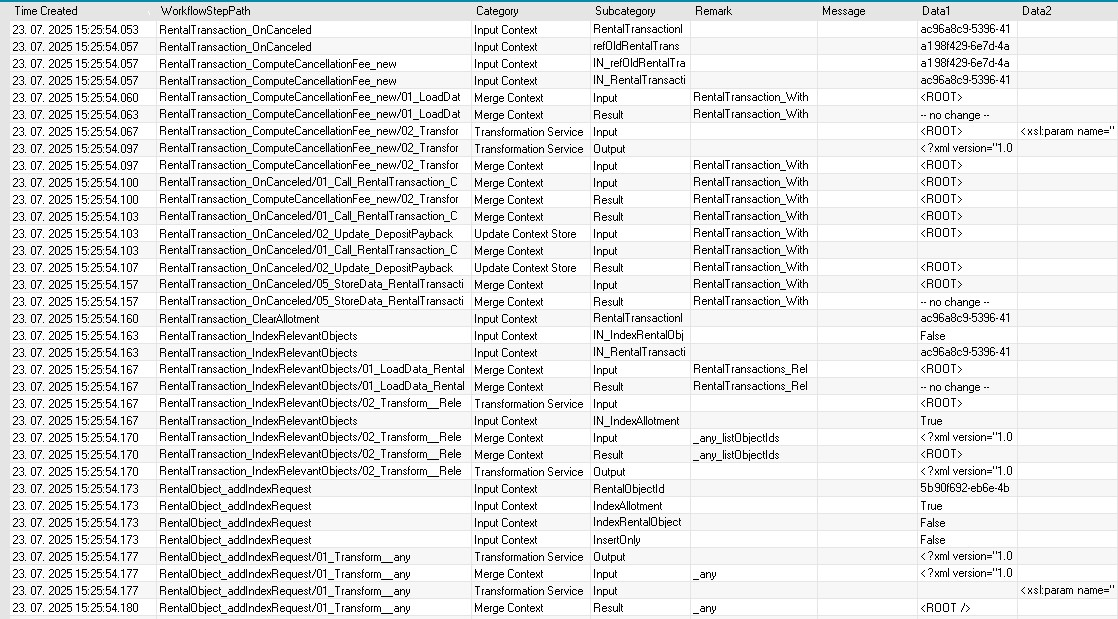
Here is a screenshot from a more sophisticated workflow:
Notes:
- Each step can be further divided and viewed in multiple lines – note the differences mainly in the Subcategory column.
- Subcategory Input contains all the input data for that particular step and Result shows the merged data. Output represents the data coming out from a transformation.
- In the Remark column you find information about the context store used in that step.
- The input or output data can be found in the Data1 column, while in Data2 you find information about parameters used. The data can be copied and used as input for testing transformations used in your workflows.
Limitations
- Currently all UI steps are excluded from the tracing