This article demonstrates how to create a simple sequential workflow with a user interface and a very simple XSL transformation involved.
[!success]- Prerequisites for proceeding
To follow along, you must meet the following prerequisites:
As an example, we will use the task manager from the initial tutorial.
To work with sequential workflows and business logic in general in ORIGAM, you need to understand the basics of the “XML stack”. If you are not familiar with the technologies involved, you may find the following video tutorials useful:
Introduction
The application model in ORIGAM is physically stored in XML files. The main reason for this is that storing the model in files makes versioning and collaboration much easier than using a relational database. When modeling business logic, such as sequential workflows in this case, XML is also used in the background. This allows us to use XSL transformations for working with data in workflows. In addition, XPath is used to address XML elements entering the transformations. This is why familiarity with these languages is required when modeling business logic in ORIGAM.
Technically, sequential workflows can be run by users or called by other business logic functional flows, for example by other workflows. Workflows available to users are located either in the main menu or as buttons in the toolbar.
In this example, we will create a simple workflow that assigns all selected tasks to the current user.
Workflow creation
Our workflow will consist of the following steps:
- Load all existing tasks
- Select tasks
- Assign selected tasks to you
- Save changed tasks
To create the workflow, go to the ORIGAM Architect, open the Model Browser tab, navigate to Business Logic / Sequential Workflows / your package, right-click on your package and choose new Sequential Workflow:
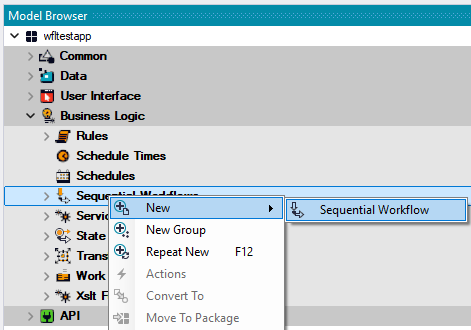
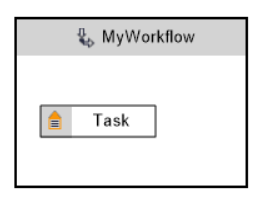
What you get is:
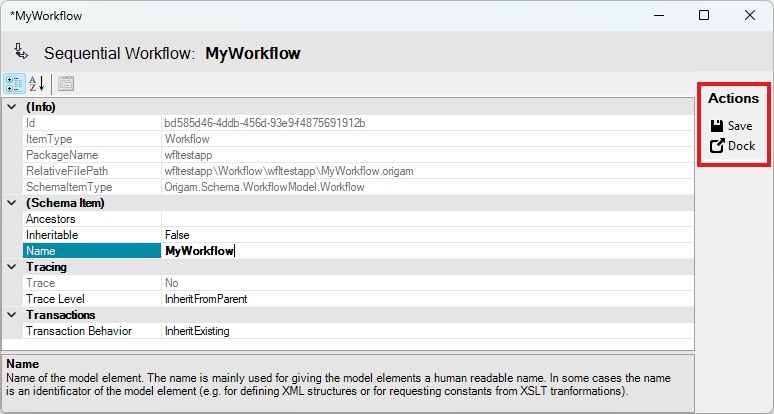
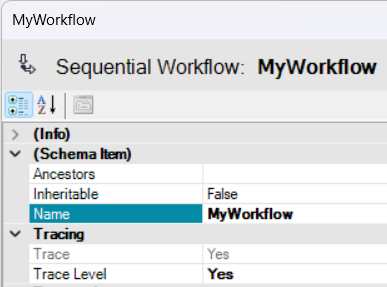
Name your workflow and optionally change the Trace Level to Yes. This will allow you to debug your workflow later using the Trace Tool.
Now there are two possible actions:
- Save – saves the workflow and opens the workflow diagram editor
- Dock – opens it in the standard property editor, but without saving it
For the purpose of this tutorial, choose Save.
Context Stores
As any workflow usually operates with data, you need some kind of temporary “memory” to store that data. In ORIGAM, such a data repository is called a Context store.
Context stores take care of all data used across your workflow, and you need to create at least one. A Context store can be based on XML and linked to a specific Data Structure, which defines its structural content, or be a simple value defined by the data type (e.g. integer, date, string).
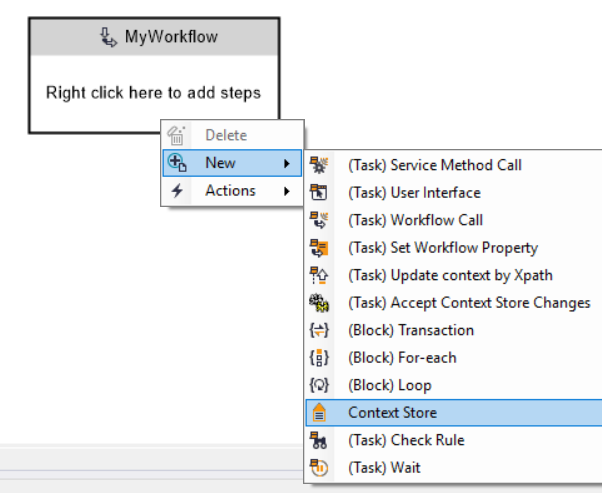
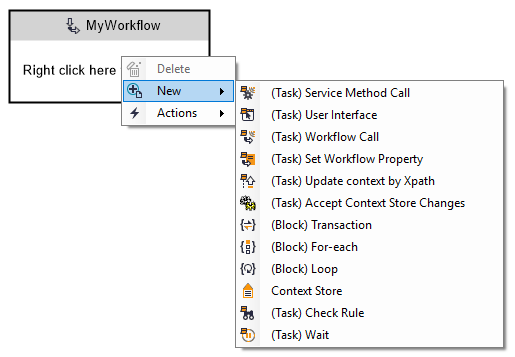
To create a new Context store, right-click on your workflow (either the box in the diagram editor or the workflow name in the Model Browser tree) and select new Context Store:
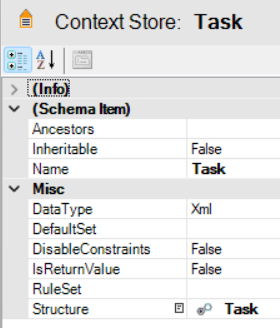
In the editor, select your Data Structure — in this example, we use Task — and save it. The Context store name will be set automatically based on the Data Structure name:
One Context store can be based on a single structure, but that structure may contain multiple entities.
This is the workflow diagram editor with a new Context store created:
If you haven’t done it earlier, you can now set up tracing for your workflow, as you may need it later.
Double-click on the workflow header and configure it:
Workflow steps definition
In general, each workflow consists of multiple steps, typically the following:
- Load Data
- Transform
- Store Data
Steps can be grouped using blocks; however, in this article we demonstrate a simple workflow without blocks.
Step 1: Load all existing tasks
If we want to show all existing tasks to the user, we first need to load them.
To add a new step, right-click on your workflow again:
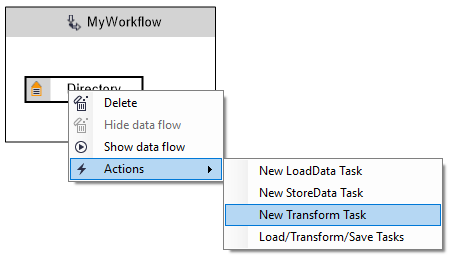
Alternatively, when you right-click on a Context store you can use actions predefined for the most frequent operations:
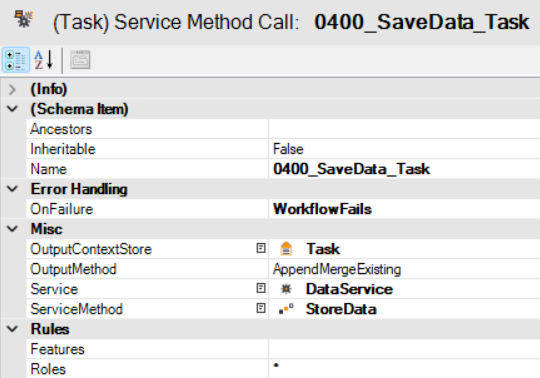
Here, we will create a new (Task) Service Method Call:
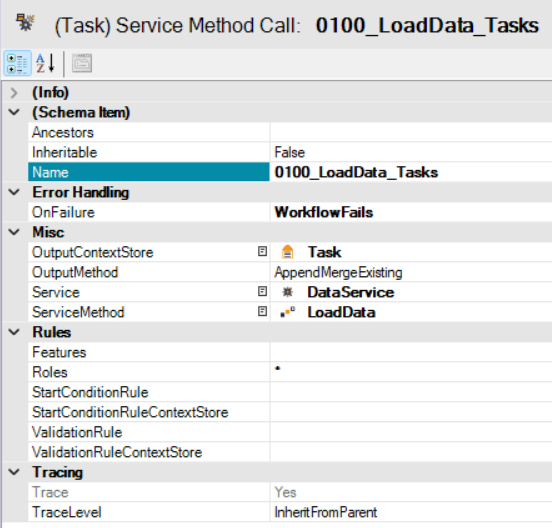
Notes:
- Our naming convention for sequential workflow steps includes:
- numbering of each step (0100, 0200, 0250, etc.)
- the action (LoadData, StoreData, Transform, etc.)
- the related Entity or Data store (here “Task”)
- Error Handling is set to
WorkflowFailsonOnFailure, which stops the workflow if any error occurs. OutputContextStoreis set to one of the existing Context stores in the workflow (here “Task”).OutputMethoddetermines how data is written to the output Context store (hereAppendMergeExistingappends new data to existing content;FullMergewould clear existing content and then write new data).Service– to load existing data, you need to useDataService.ServiceMethod– for loading data, use theLoadDatamethod.Roles– we keep the workflow available to all users using the asterisk symbol.TraceLevel– we use the same level as set for the whole workflow.
Step 2: Select tasks
Once all existing tasks are loaded into the Context store, we need to display them to the user and allow them to select which tasks to reassign.
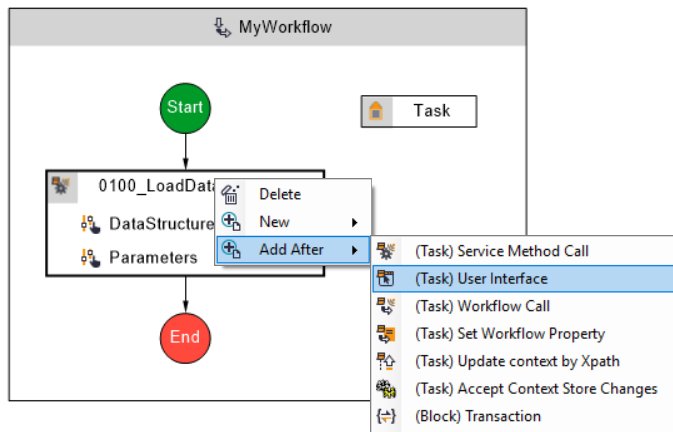
For this purpose, right-click on the first task, select Add After and create a new workflow step of type (Task) User Interface:
Configure it as follows:
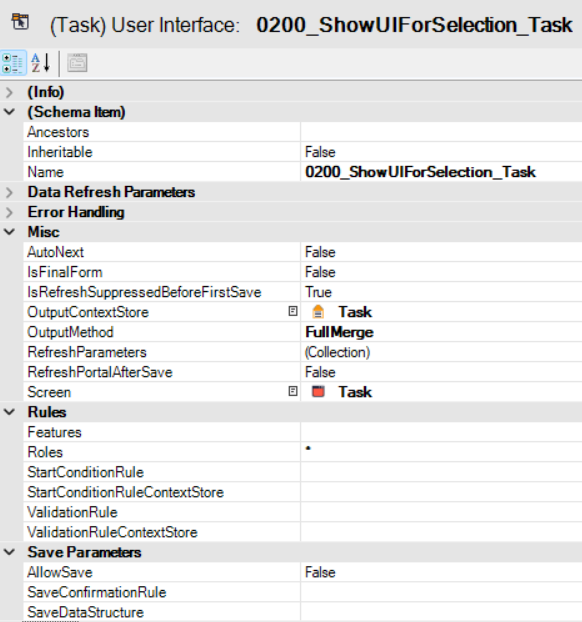
Notes:
IsFinalFormis set toFalsebecause this is not the last step of the workflow.OutputMethodis set toFullMerge, this is the default setup for a user interface task.Screenis set toTask, reusing the existing Task screen as a list view. Checkboxes will be added later.AllowSaveis set toFalse, as we do not want to display the standard Save button in the workflow screen. Changes will be saved in the following steps.
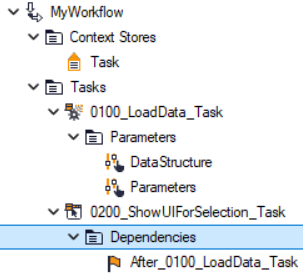
Now the second step is added to the workflow schema:
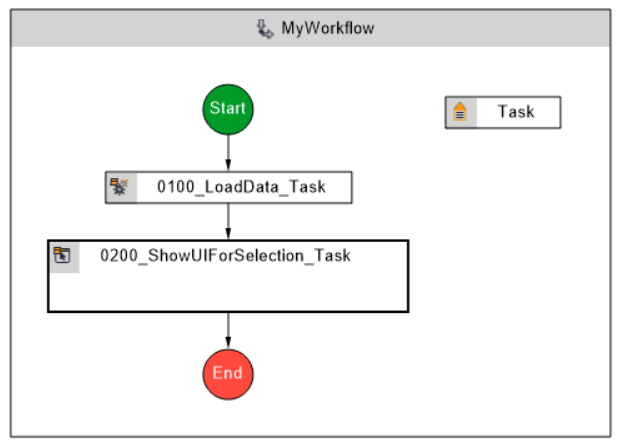
Note that a new element named Dependencies is created in the Model Browser. It defines the sequence in which the workflow steps are executed.
To finalize this step, we need to provide the standard Task screen with checkboxes. To do this:
- Open the screen
- Click on the screen section
- Go to the
Propertiestab (accessible from the main Menu underViewor after pressingF4) - Find the
SelectionMemberproperty underMisc - Enter the field name
Selected
Now in all places where the Task screen is used, it will contain the selection checkbox. Alternatively, you can create a copy of the screen, add the Selected field to it, and use that screen in your workflow.
Step 3: Change task data
In this step, the assignee of all selected tasks is changed. One of the Task fields is updated in the Context store for all tasks selected in the previous step.
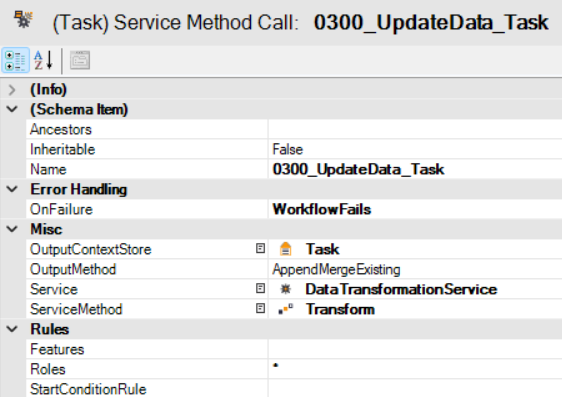
Create a new (Task) Service Method Call using the DataTransformationService and its Transform method:
Now set up the transformation script (XSLT) that will modify the data in the Context store.
In the Model Browser, navigate to Business Logic / Transformations and create a new XSL Transformation (XSLT) under your package.
The transformation looks as follows:
<?xml version="1.0" encoding="UTF-8"?>
<xsl:stylesheet xmlns:xsl="http://www.w3.org/1999/XSL/Transform" version="1.0"
	xmlns:AS="http://schema.advantages.cz/AsapFunctions"
	xmlns:date="http://exslt.org/dates-and-times" exclude-result-prefixes="AS date">

	<xsl:template match="ROOT">
		<ROOT>
			<xsl:apply-templates select="Task[@Selected='true']"/>
		</ROOT>
	</xsl:template>

	<xsl:template match="Task">
		<xsl:copy>
			<xsl:copy-of select="@*"/>
			<xsl:attribute name="refAssignedTo_Id">
				<xsl:value-of select="AS:ActiveProfileId()"/>
			</xsl:attribute>
			<xsl:copy-of select="*"/>
		</xsl:copy>
	</xsl:template>
</xsl:stylesheet>
For more details, see the tutorial related to XSL transformations. This example corresponds to the second example described there.
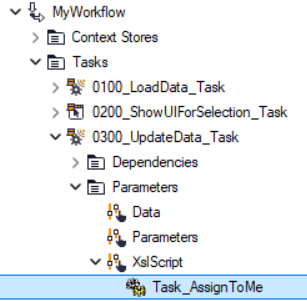
Finally, reference your transformation script in the workflow step parameters. Create a new Transformation Reference in the step and select your script:
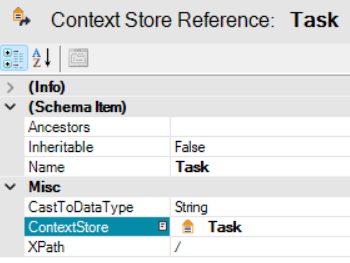
The last part of this step is to add a Context Store Reference to the step’s Data section with the source data:
Step 4: Save changed tasks
In this final step, all modified tasks are saved to the database.
Create a new (Task) Service Method Call, again using DataService and its StoreData method:
Then connect this step to the previous one by setting up the dependency.
Finally, add a new Context Store Reference to the Data section of this step, the same way as in the previous step.
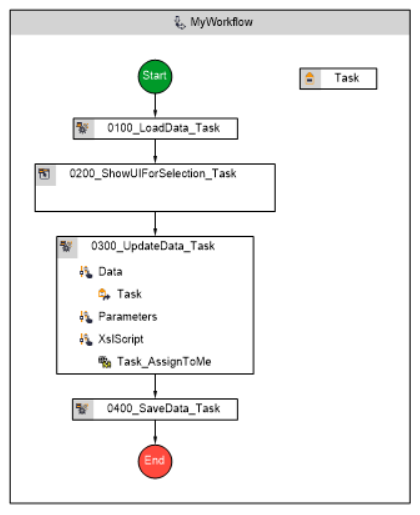
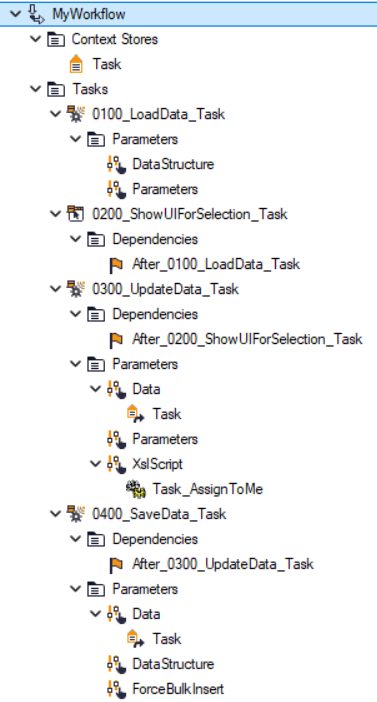
Workflow overview
Below is the complete workflow structure and content, shown both in the diagram editor and in the Model Browser:
Fine-tuning your workflow
Workflow step labels
To make the second step, where the user selects tasks, more user-friendly, change the workflow step label.
Proceed as follows:
- Select the step in the diagram editor of Model Browser
- Go to the
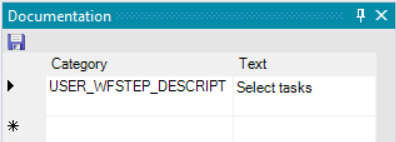
Documentationtab (accessible from the main Menu underView) - Under
Category, selectUSER_WFSTEP_DESCRIPTION - In the Text field, enter for example “Select tasks” — this is what users will see in the client application
- Click the save icon
Once this element is added to Documentation, it becomes subject to localization. This allows you to translate it easily into all languages supported by your application.
UI screen improvement
Another possible improvement is to adjust the task selection screen in step 2.
You can create an additional screen where you disable unnecessary tools and navigation elements, and set DisableActionButtons = True and HideNavigationPanel = True in the screen properties.
Workflow access
To make your workflow available to users, you need to add it to the user menu. It can also be exposed via a screen button, but in this tutorial we will use the menu.
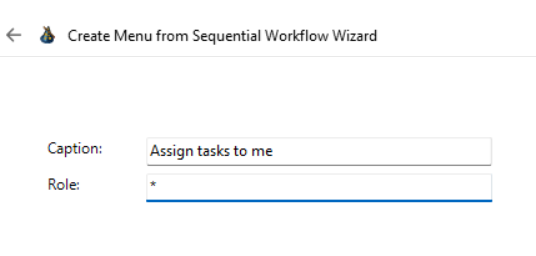
Right-click on your workflow in the Model Browser and choose Actions / Create Menu Item. This wizard creates a new workflow reference:
Running the workflow
After everything is set up and the server is restarted, you can test your new workflow in the client application. You can also run it directly in the Architect, but in this example we use the client app.
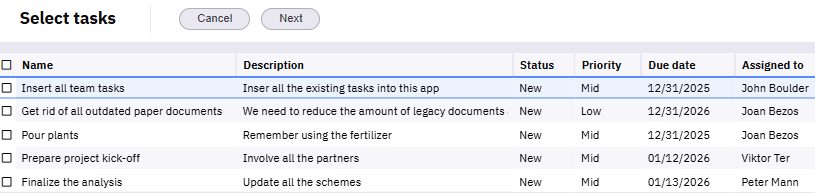
When you activate the workflow from the user menu, you will see the user screen from the second step:
After selecting tasks and clicking the Next button, the workflow finishes and the selected tasks are assigned to you.
Troubleshooting
If your workflow does not work as expected, run the workflow trace as described in this article, identify the problem, fix it, restart the server, and run the workflow again.
When needed, you can also consult the documentation for sequential workflows and XSL Transformations.