This article helps you get a basic orientation of the two main components of the ORIGAM Platform: the Architect and the client application. This serves as preparation for creating your own project and application.
New here? If you haven’t installed and set up the ORIGAM Architect yet, please refer to the previous chapter: Getting Ready.
The ORIGAM Architect
The Architect consists of the following parts:
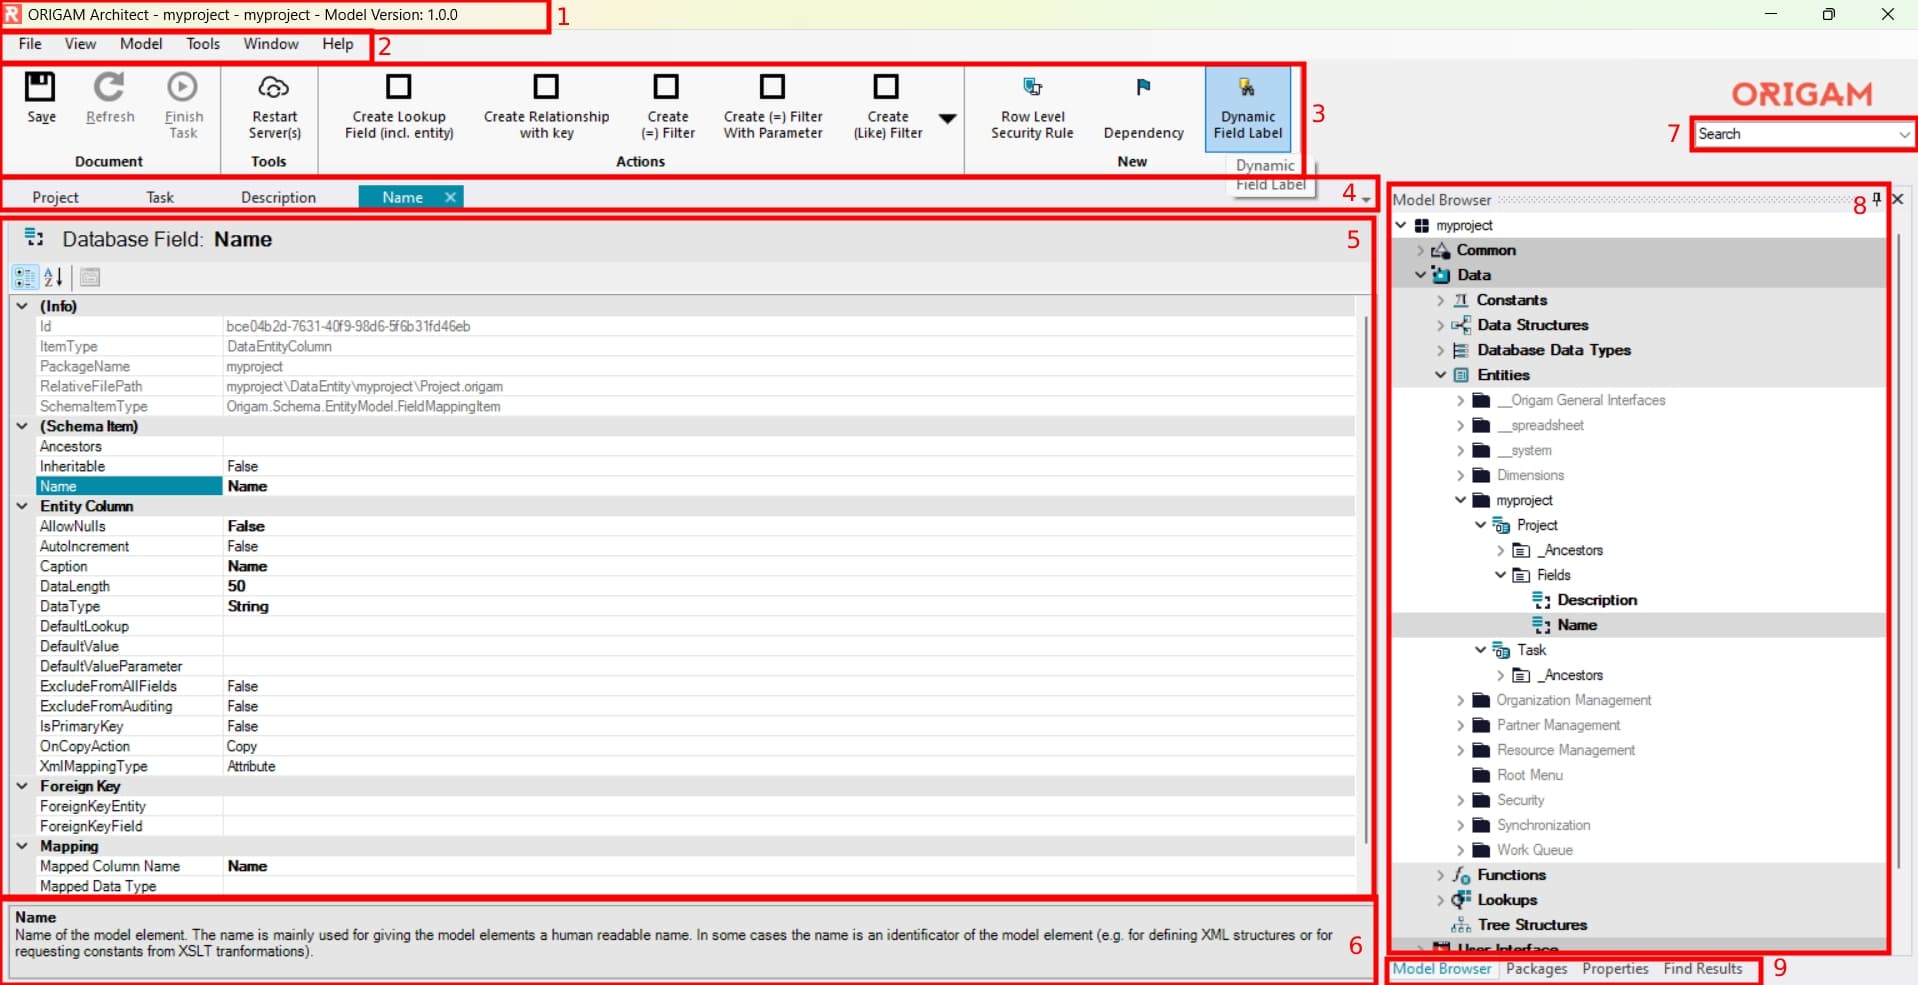
1: Upper bar
![]()
The upper bar displays the name of your open project, the name of the currently open package within the project, and its model version.
A package is a functionality bundle that forms part of the model. When you open a new project, you will notice that several default packages are already created, such as Root, Root Menu, and Security. These packages contain the basic functionality required by any application. Unless you’re building something like your own login infrastructure, you’ll typically use these and add new packages to provide your own functionality on top of them.
2: Main menu
Here, you will find all the available functions and settings in one place, organized into categories.
![]()
3: Toolbar
This is another menu offering a selection of functions divided into four sections: Document, Tools, Actions, and New. The first two sections are fixed, while the rest change depending on the context.

4: Editor tab bar
The tab bar displays all the open editors, such as data entities or tools like the SQL generator.
![]()
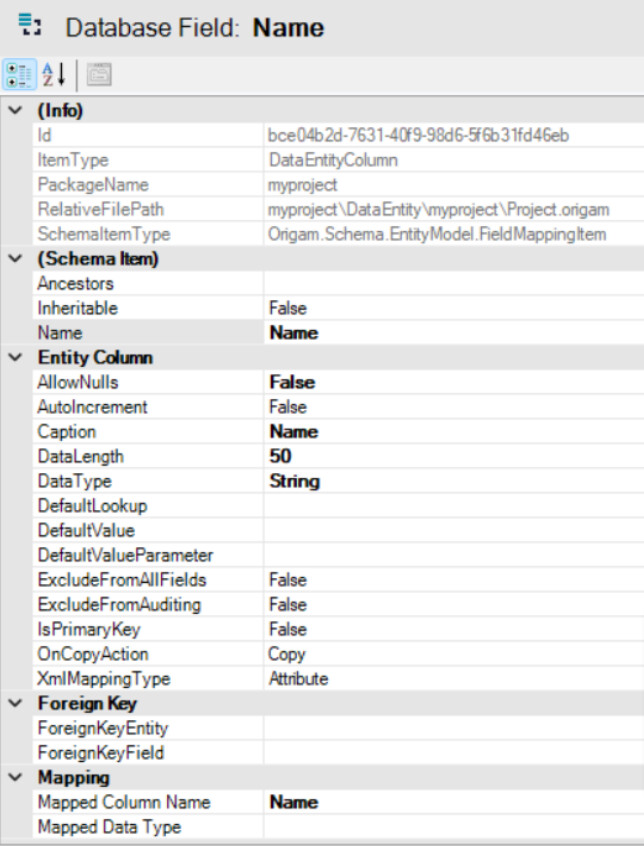
5: Editor
This is the main workspace, where you can edit data elements, user interfaces, workflows, business logic, and more.
6: Editor help and tips
If available, this bar provides helpful tips and information related to the element currently open in the editor.
7: Search bar
A standard full-text search bar that allows you to search across the entire model.
![]()
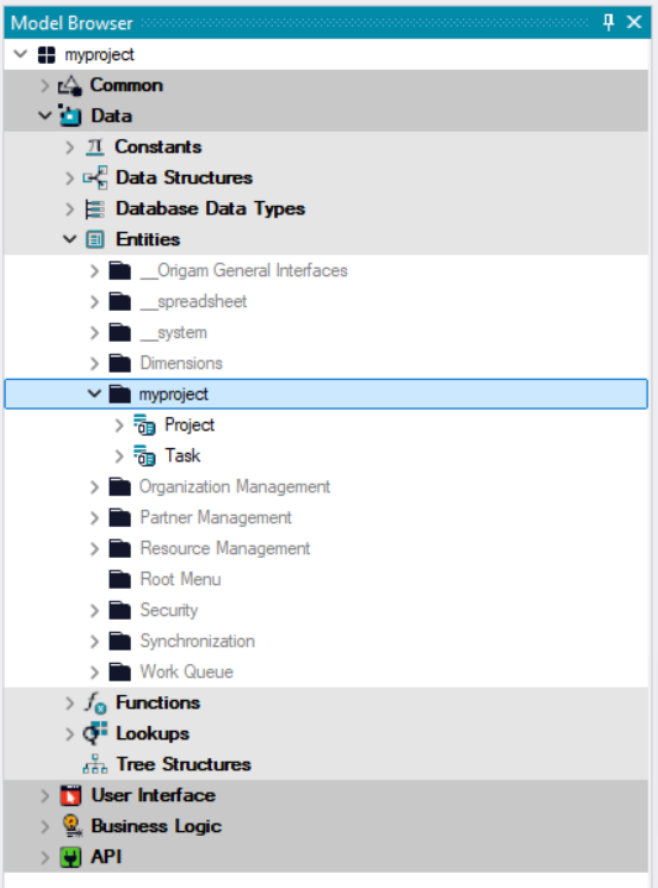
8: Browser
The browser shows all the elements of your project model. The key section is the Model Browser, which is organized in a tree view with categories: Common, Data, Business Logic, and API.
9: Browser tab bar
This is where you can switch between the various entities visible in the Browser, such as the Model Browser, Packages, Properties (for the currently open element in the editor), and the Results from search or other actions.
![]()
The client application

1: Placeholder for logo or specific information
This section typically contains the logo of the system operator, but it can also display other information, such as a timer, stopwatch, or the name of the object the user is currently working with. For example, if I am processing a specific apartment within a building, I can display its name here.
2: Menu bar
The menu area typically includes user queues, a menu of individual modules, and system actions, along with options for my favorites, data items, and search results.
3: Upper bar
The top bar contains actions, default (or custom) user actions, search, the user avatar, and links to Help, About, and Logout.
![]()
4: Working area
This part of the application displays the data the user is working with—the actual content of the system—such as data reports, documents, charts, maps, and more.

This is just a simple, basic guide on how to use the client application. You can find more detailed information here.
Platform settings
If you want to change the default settings of the platform or add new ones, here’s more information on the existing configuration files:
Architect Settings Documentation (OrigamSettings.config)
Client Application Documentation (Appsettings.json)
Server Error Logging Setup (log4net)
Custom Library Dependency Configuration
~
Now that you’re more familiar with the ORIGAM Architect environment and the client application, you’re ready to start creating your own project. Excited? Then check out the next chapter: Your First Project.