This guide demonstrates how to upgrade all components of the ORIGAM platform, namely the Server and Architect.
[!success]- Prerequisites for proceeding
To follow along, you must meet the following prerequisites:
The ORIGAM platform is still under development, with new features continuously being added and bugs being fixed. The release cycle for new versions is monthly, meaning that 12 new versions with either minor or major changes are released every year, in addition to often having sub-versions—patches for each release.
The reasons you need to upgrade are:
- If a new functionality is released that you are interested in and need
- When there is a fix for a critical bug
- Once a year, if not otherwise needed
Continuous upgrade
We recommend upgrading the platform continuously, even when there isn’t a specific need, such as acquiring a new feature. While the platform will still function without continuous upgrades, upgrading after skipping several versions can become more difficult and time-consuming, requiring additional effort for implementation and testing.
Each new version introduces various changes, all of which are detailed in the release notes. For example, you can find release notes for the version actual at the time this article is being written here. Pay particular attention to any breaking changes and metamodel updates, as these affect backward compatibility.
If you’re upgrading across multiple versions, we recommend reading the release notes for each version between your starting version and the new version. This will give you a comprehensive understanding of all the changes that will be implemented with the new release.
Single platform version
It is crucial to understand that each project is tied to a specific version of the platform, which includes a particular version of the ORIGAM Server, Architect, and application metamodel. If you wish to upgrade to a newer version, you must upgrade the entire platform to ensure the versions of the Server, Architect, and metamodel are consistent.
On the Github ORIGAM release page, for example, you may see the following:
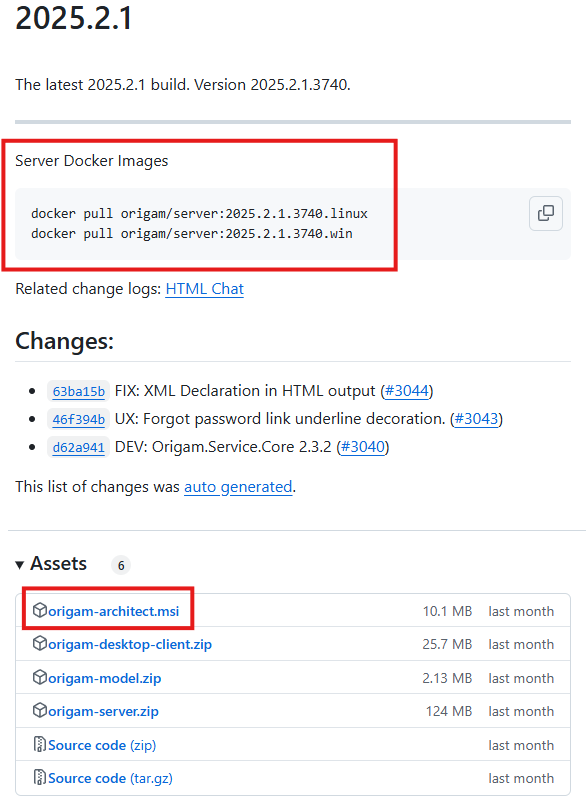
These versions of Server and Architect work with a specific version of the metamodel and the version of your application model should match that. More about versioning of your model you can find in this article.
Now, let’s examine the upgrade process for each component in detail.
Architect upgrade
The Architect desktop application isn’t upgraded in place; instead, you install and run a new version alongside the current version, and potentially all previous versions that you have installed.
Therefore, upgrading Architect follows the same process as installing it from scratch, as described in this article.
If you’re using MS Windows, you will typically find all Architect versions under C:\Program Files (x86)\ORIGAM:
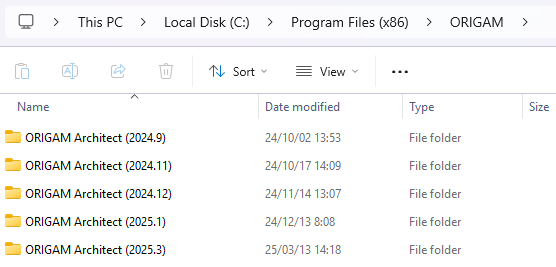
The Architect folder name is set when it is first installed, so it may be different on your system.
Having different versions of Architect installed separately allows you to run all of them independently and keep every project in a particular version of the platform.
To avoid confusion between versions, remember managing your Architect shortcuts or taskbar icons properly.
Server upgrade
To upgrade your ORIGAM Server, you need to download a new image and create a new container from it in Docker. This enables you to run different Server versions in separate containers and be able to switch among them. More details are in this article.
The procedure is the following:
1, Delete the container with the Server you want to upgrade (or just stop it if you want to keep it)
2, Edit the Docker deployment script specifying your ORIGAM Server target version
3, Run Docker deployment script to create a new container from a new image
There is also a couple of useful things you need to know.
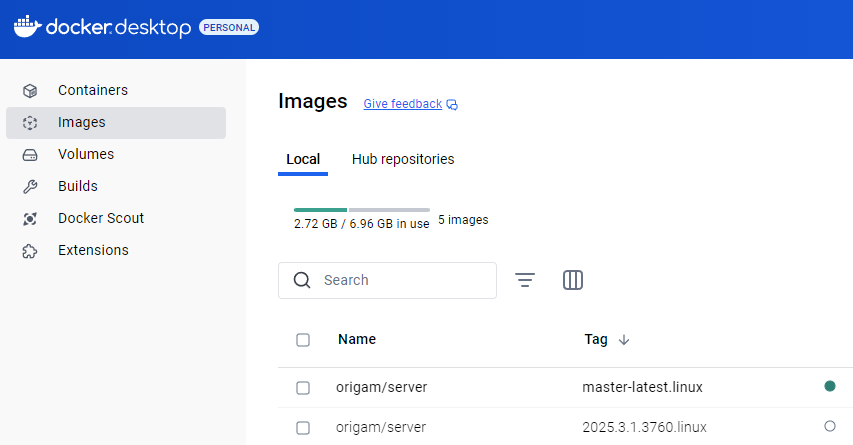
When a new project is created, the Docker .cmd file defaults to the origam/server:master-latest.linux image, meaning the latest published Server image is used. If you wish to target a specific Server version, you can change it to something like origam/server:2025.3.1.3760.linux for example.
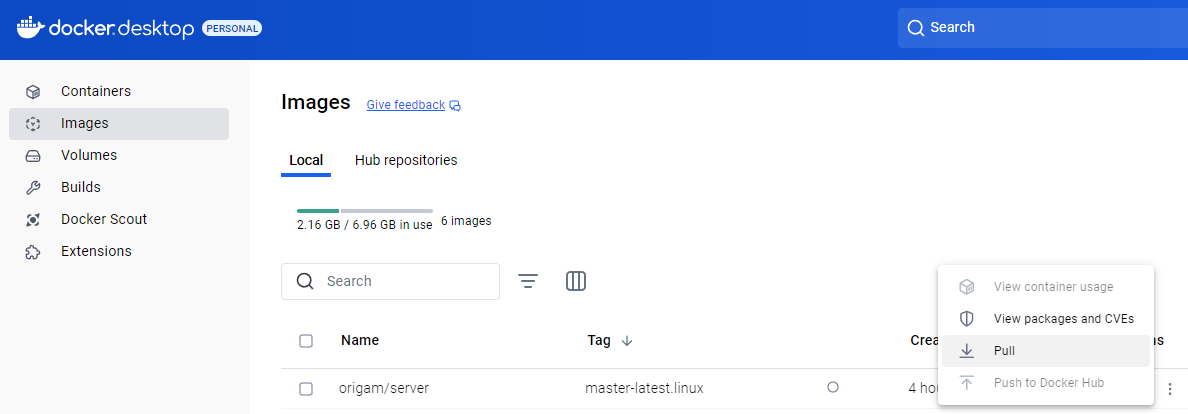
If you just want to upgrade the master-latest image, you can pull the update directly using the image actions (icon with three dots):
Model upgrade
The metamodel, often referred to simply as the “model,” contains the content definitions for all XML files that define a project or application and just like anything else the default metamodel evolves over time — new items are added, and existing items may be changed and so on.
If you update ORIGAM Server and Architect, they contain the current version of the metamodel. You must then convert your application model to this version of the metamodel to make both versions compatible. This conversion is handled automatically by Architect, which updates your model to the current metamodel version when you first open your project.
In addition to the model you created, your project also contains at least some system packages such as Root or Security, and when their model changes, your project needs to be updated as well. ORIGAM Server and Architect need to have system packages that are always up-to-date.
The model upgrade of all the system packages is done by downloading the origam-model.zip file, which you can find in the Assets:
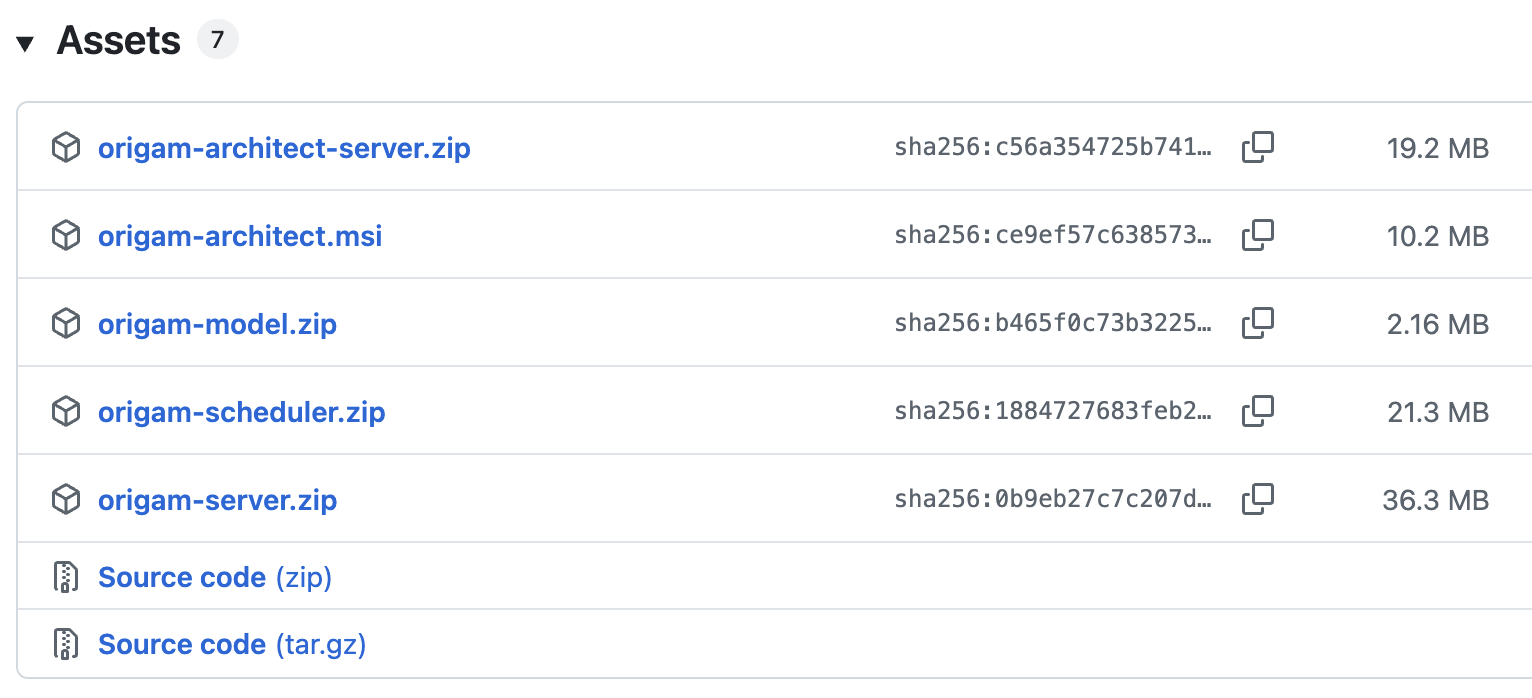
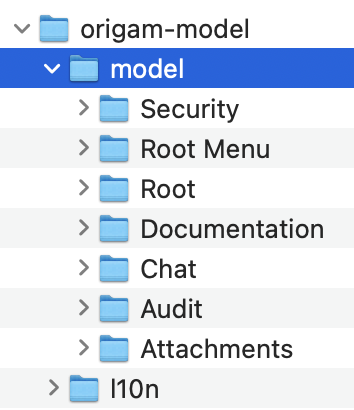
This zip file contains the system model packages and the translation folder (l10n):
Changes can also occur at the data level, so the update may include deployment scripts that modify the database structure (new table or field), data content of system packages or functions (new application role) or it can include even a new database procedure. ORIGAM Architect will also take care of running these scripts automatically when you first open your project.
When you open your project in a newer version of Architect, all the updates will happen automatically once you load any of the affected packages. However, if you try to load your model in an older version of Architect, it will be rejected. If no changes have occurred in the metamodel between two specific Architect versions, this will not be an issue.
Before you start
Upgrading a platform can be a complex process that can affect both your project model (system packages) and its database (structure, content, and procedural functions), so it is good practice to create a good recovery point in case something goes wrong. Yes, we mean good old backups ![]()
What to back up before upgrading:
1. Model – save the “pre-upgrade” version to both local and remote Git repositories.
2. Database – make a backup (“dump”) of the project database, including both structure and data.
3. Custom component data – builds and plugins for both frontend and backend.
Project upgrade
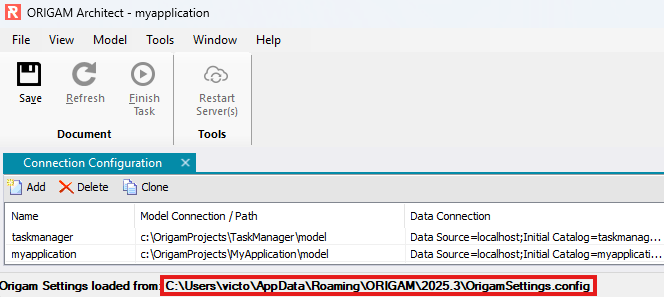
To open projects created in older versions of Architect in a new version after upgrading, you need to copy the OrigamSettings.config file from the old Architect folder to the new one.
For example, if you upgraded from version 2025.1 to 2025.3 and you are using MS Windows, copy the file OrigamSettings.config from:
C:\Users\YourUsername\AppData\Roaming\ORIGAM\2025.1
to
C:\Users\YourUsername\AppData\Roaming\ORIGAM\2025.3.
The path of the file you can always find in the Connection Configuration screen located in the main menu under File in Architect:
Once you have done this, you can open your project in the new version of Architect. When loading any of the packages where changes have been made to the database, Architect will automatically offer to run deployment scripts that will reflect these changes in your project’s database.
The changes will affect all packages within their hierarchy. For example, if you load a package with your application that references the Root Menu system package, which in turn references the Root and Security packages, the scripts associated with all these packages will be run.
Upgrade testing
After upgrading the platform, remember to test all relevant and important functions in your application. While upgrades generally do not cause issues, it is advisable to verify at least the critical functions or processes, especially if your upgrade spans multiple versions or if any of the changes in the new version are directly related to your project.
Version comparison
That being said, we recommend upgrading on an ongoing basis. However, if for some reason it is necessary to upgrade across multiple versions, it is possible to use Github’s version comparison to easily get a list of all the changes that have been implemented between the original and the new (target) version.
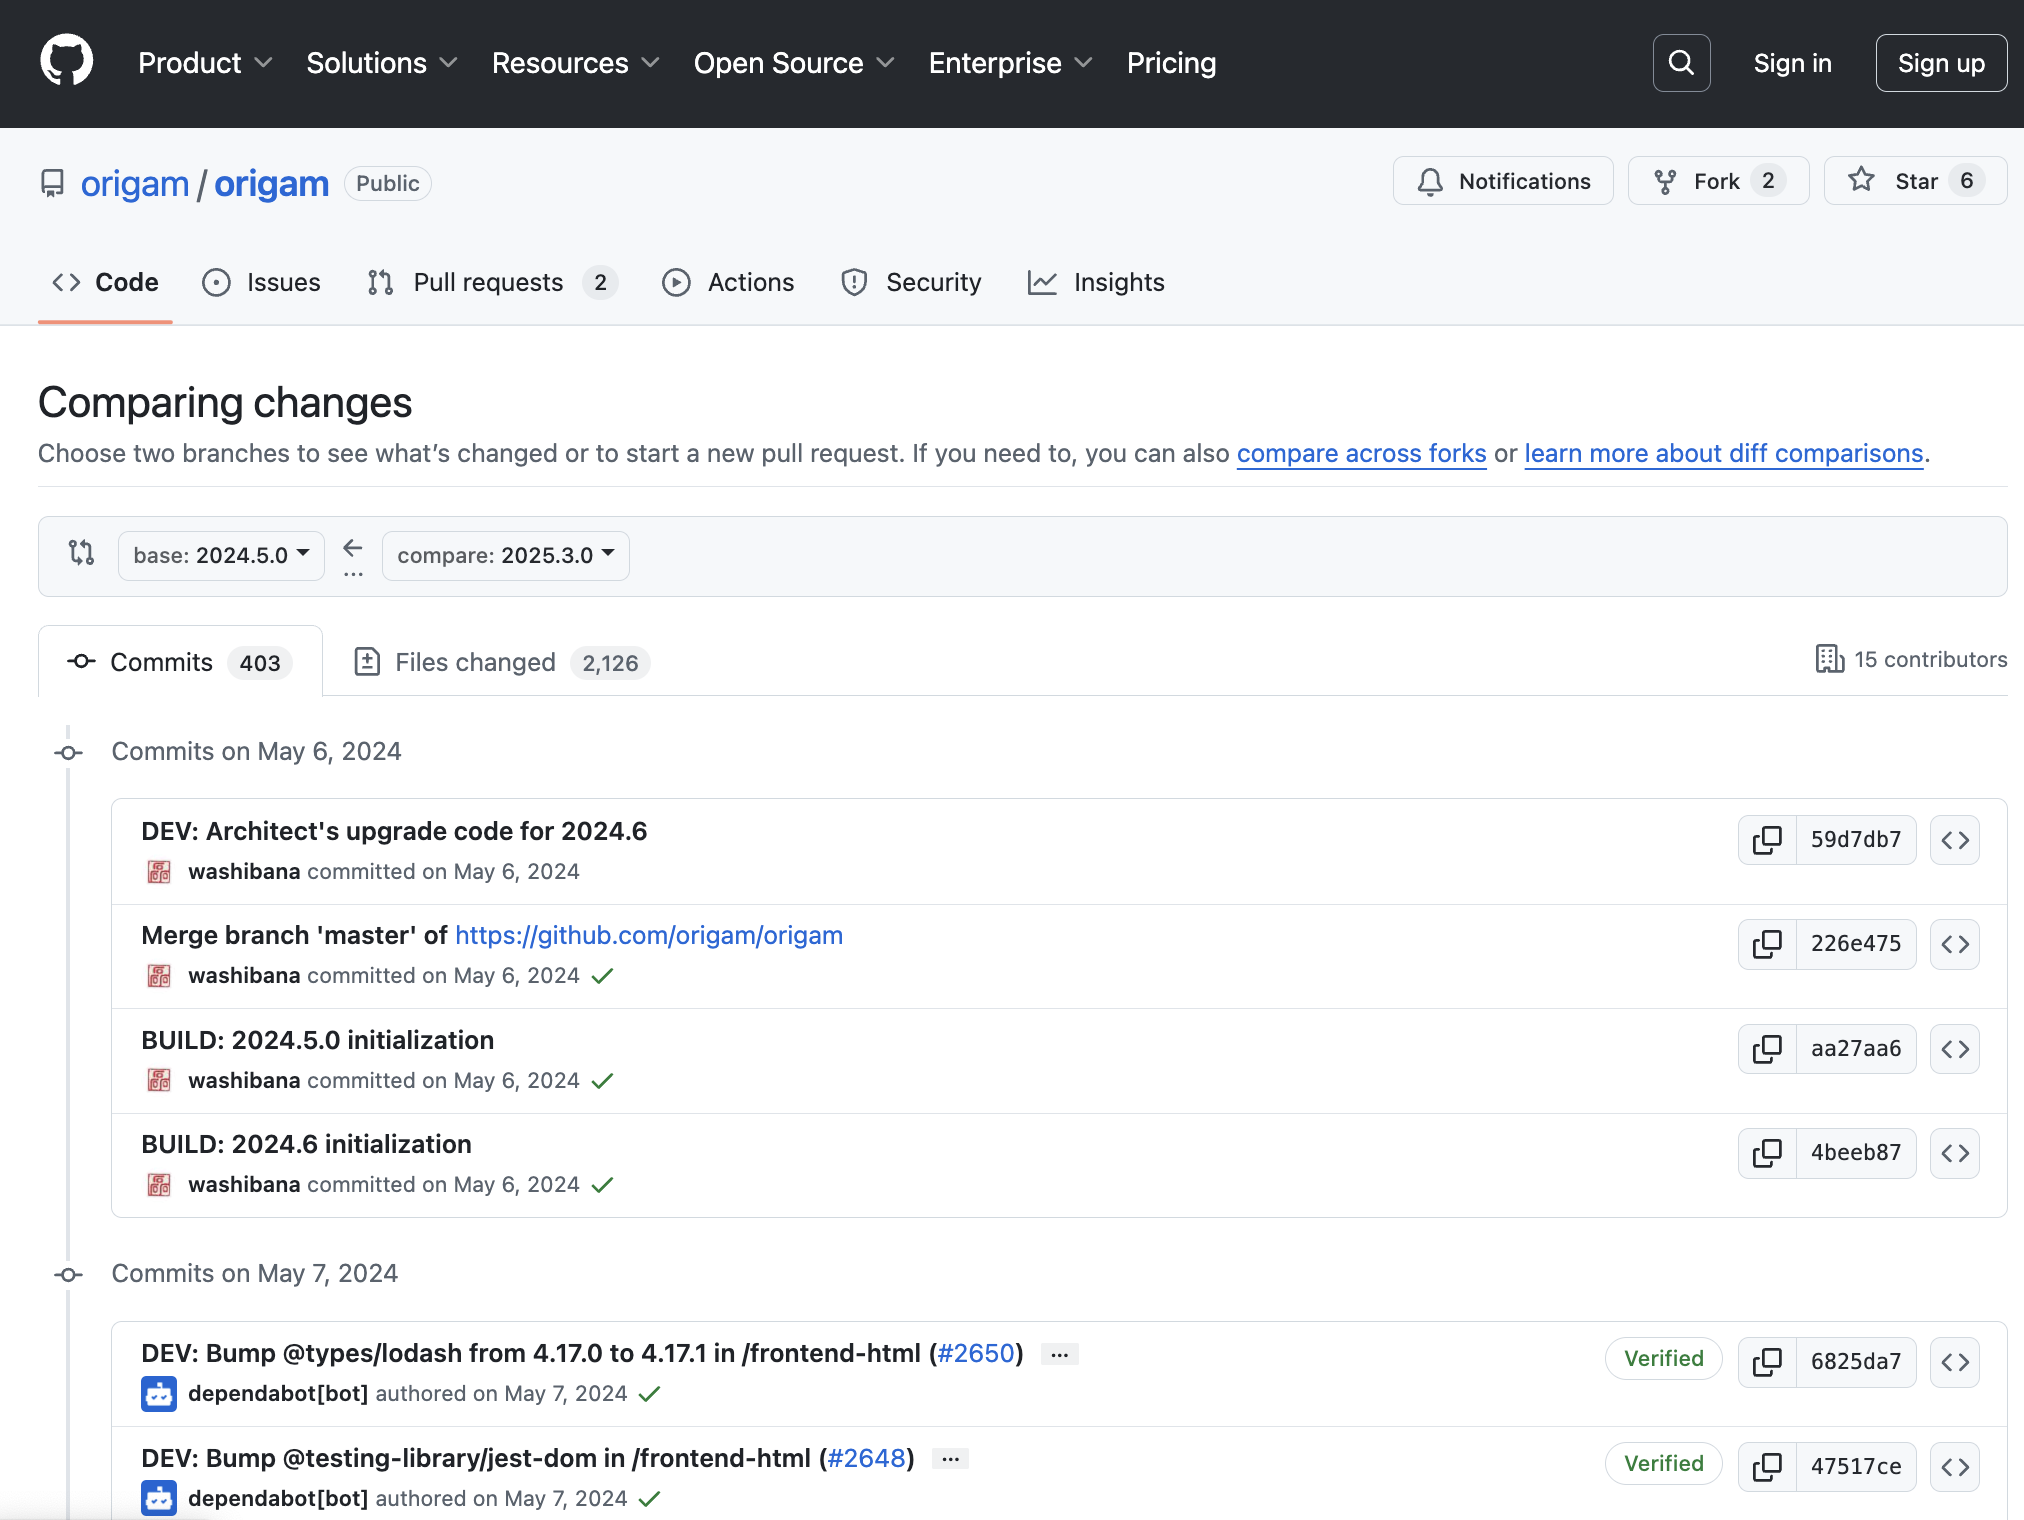
In Github, just use the Compare button on the target version and select the version to be upgraded to compare:

Here is an example of the output we get when comparing version 2025.3 with the older version 2024.5:
Here you will see very detailed information about all changes made to the code. If you want more summarized information, you need to look at the release notes of each version.