This guide explains how to create new users, define application and user roles, and assign them to users. Additionally, you will learn about the predefined settings in ORIGAM.
[!success]- Prerequisites
To follow this guide, ensure you meet these four basic requirements:
- Running database server
- Running ORIGAM Server
- Project created in ORIGAM Architect
- Client application running in your browser
Once set up, log into the client application using the username and password created during project setup.
In the client application, each user is assigned one or more user roles, which in turn have one or more application roles (also called permissions). This ensures that users only access authorized parts of the application.
Default Users, Roles, and Settings
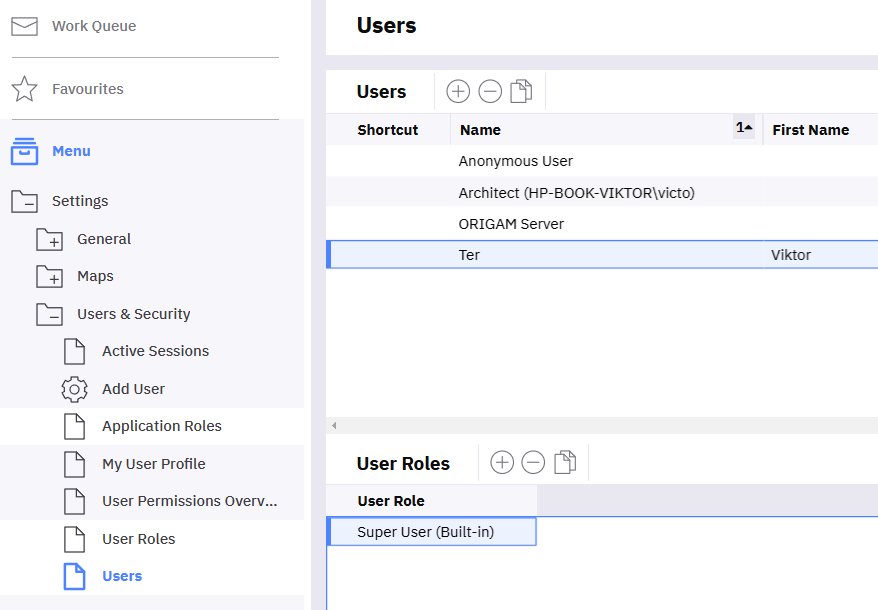
When starting a new ORIGAM project, predefined settings and content are available. Navigate to Settings / Users & Security / Users to view system users, user roles, and application roles.
By default, a new project includes three system users and an initial user with the Super User role (administrator):
A predefined set of application roles is also available, primarily corresponding to items under Settings in the main menu:
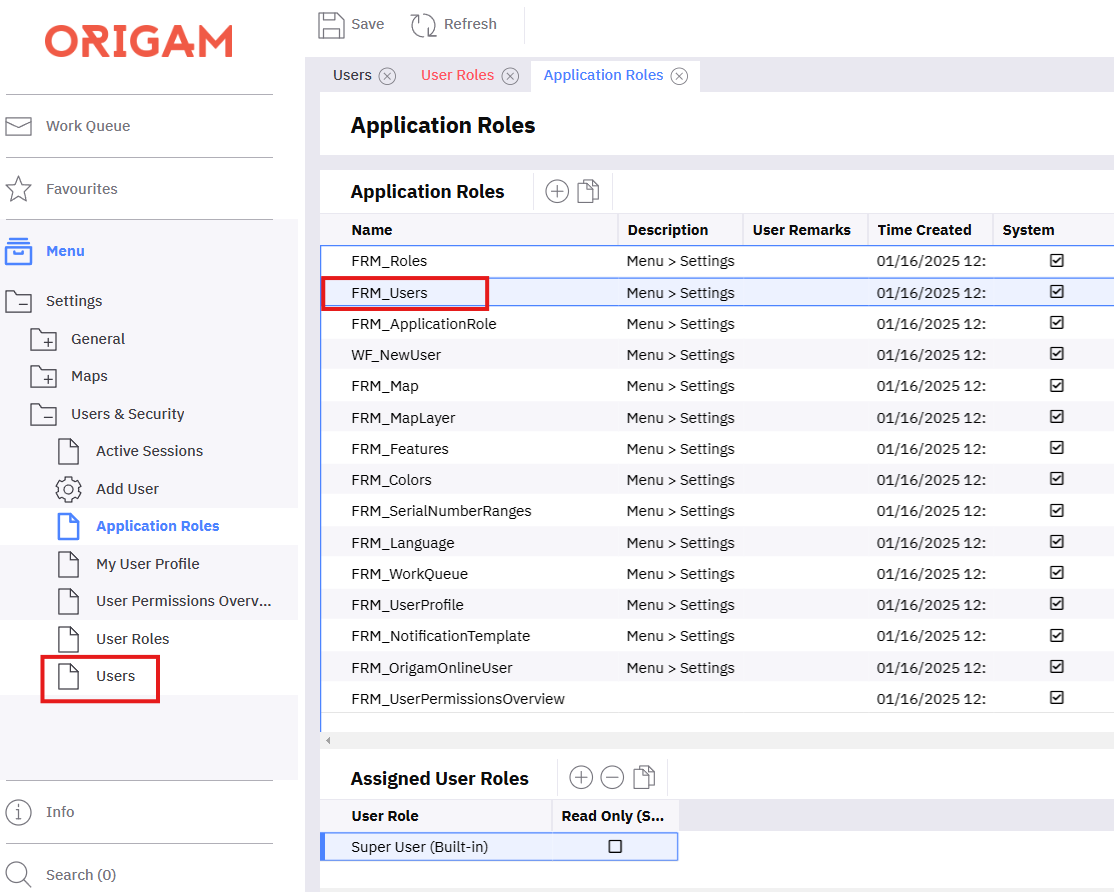
For example, the FRM_Users application role grants access to the Users form.
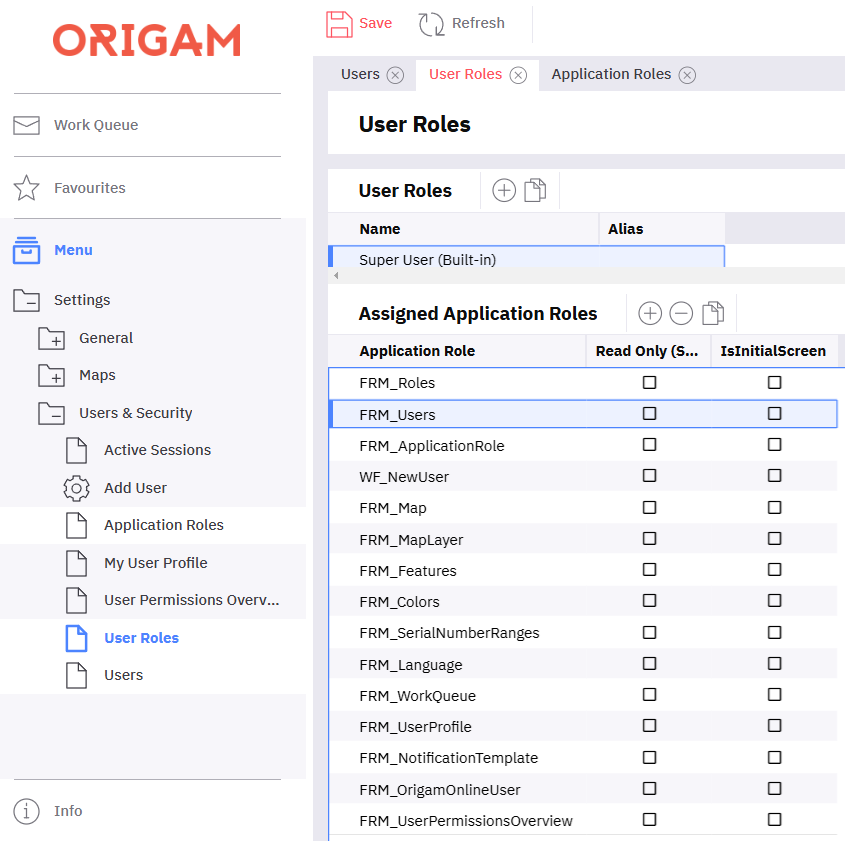
By default, the Super User role includes all application roles:
This means the first user you create as a Super User has unrestricted access.
Creating New Application Roles
Application roles determine which screens a user role can access.
There are two ways to create new application roles:
- As Part of the Model - Included in every instance of the application.
- As Part of an Instance - Specific to a single instance of the application.
As Part of the Model
Application roles that should be deployed across all instances must be created in Architect. You can define them manually or use the Create Menu Item action to assign a Screen to a menu item:
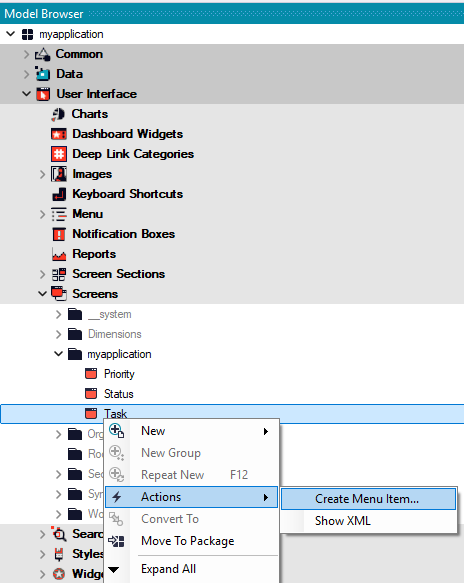
This action generates a Screen Reference, a menu item, and a deployment script to authorize access to the screen.

Before using the application role, execute the deployment script.
As Part of an Instance
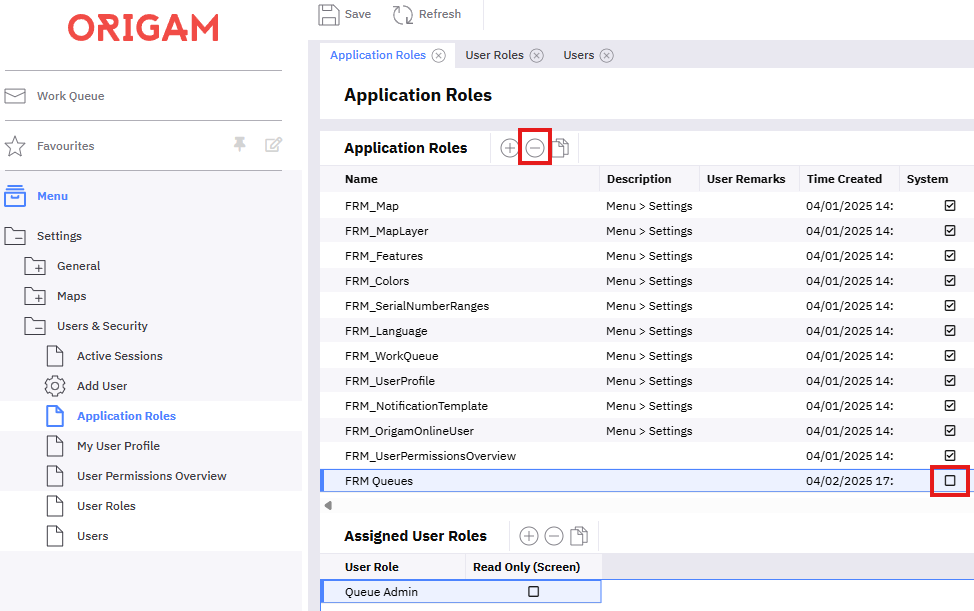
In some cases, application roles are needed for a specific client instance (e.g., queue management or filtering drop-down menus by user role). In this scenario, create them directly in the client application using the plus or duplicate icons:
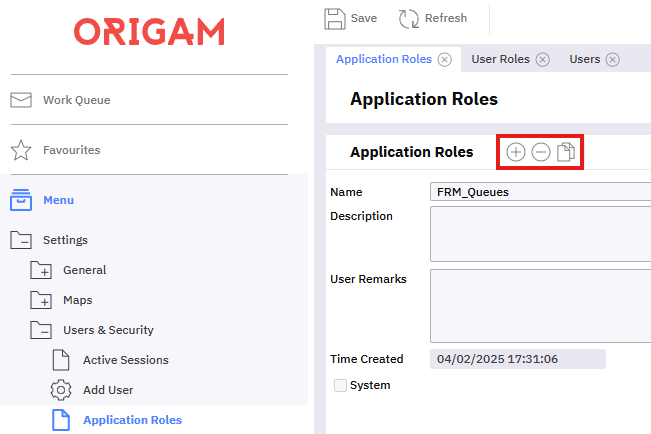
Fill in at least the Name field, following the naming convention (FRM_ prefix for forms). Save changes to apply the role.
Roles created this way are not system roles and can be deleted:
Creating New User Roles
User roles are tied to a specific application instance and must be created within the application.
To create a new user role:
- Use the plus or duplicate icon.
- Assign application roles to it.

If you want to restrict standard users from accessing application settings, you can create a custom user role and assign it only the FRM_UserProfile default application role. This will limit their access only to the My User Profile form within the default application settings.
Creating New Users
To manage users, go to Users. To add a new user, navigate to Add User:
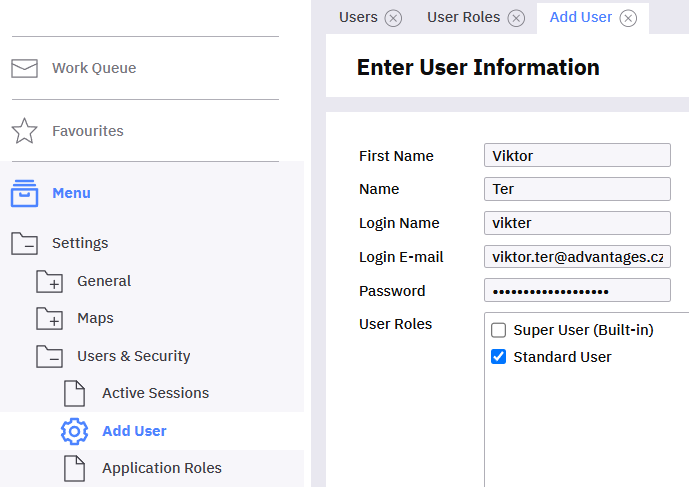
Enter the required details, set a password (minimum 6 characters; configurable in app settings), and assign at least one user role.
Save the changes to create the user.
To activate the user immediately, go to Users and click Confirm Email:

Alternatively, users can activate their accounts via email, but you must first configure the mail server.