This guide shows how to create split screens — screens divided into two separate parts that can be linked together. Sometimes this type of display is also referred to as a master-detail screen. In addition to that it shows as well how tabs can be used in screen sections. It is a continuation of the first part named How to create Screens.
As an example, we will use the Task Manager app.
Introduction
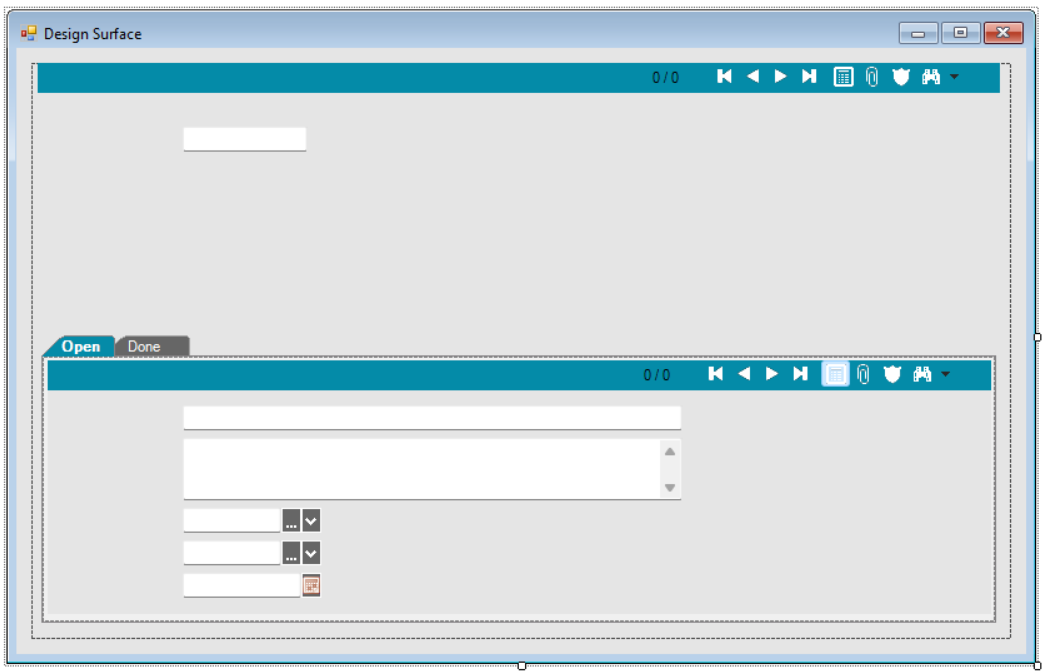
To better understand what we are about to demonstrate, have a look at this split screen:
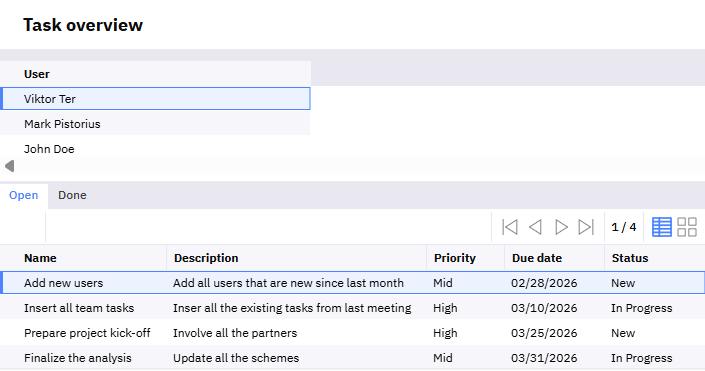
In the upper part of the screen there is a list of existing users. When you click on any of them, you can see the tasks assigned to the selected user in the bottom part of the screen. In addition, you can switch tabs and view different items related to the selected user — open or completed tasks in this example.
To create such a screen you need to link the entities in both parts of the split screen, as well as create screen sections used in both parts and all the tabs. This tutorial will show you how to do that.
Preparations
Before we start creating the split screen itself, we need to prepare some model structures for it.
Entity relationship & key
To link the entities in the split screen — users and their tasks in this example — you need to create a relationship between them and also a key that relates particular fields from both entities.
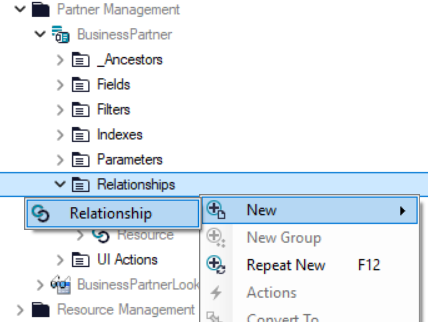
The relationship should be created on the parent entity, which in this example is the system entity BusinessPartner that represents the user in ORIGAM:
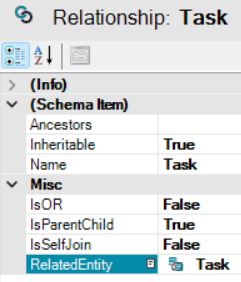
This relationship is of type “parent-child” (IsParentChild = True), where the user (BusinessPartner) is the parent and the task is its child. Therefore the Task entity is specified as the RelatedEntity:
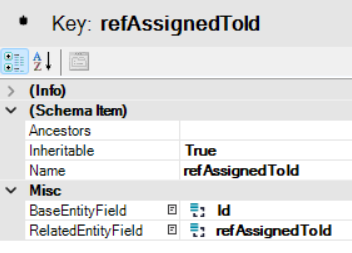
Once the relationship is created, you can add a key to it. This key links the parent entity BusinessPartner and its field Id with a field from the child entity — Task.refAssignedToId in our example:
This type of relation (entity relationship and key) is similar to a foreign key used mainly for database structures — both relate two fields from two entities together. However, they serve different purposes: one is used for data integrity and the other for the application model.
Data structure
Entities
The data structure for the split screen needs to contain all the entities used in the screen, including the content of all tabs.
For this example we need just two entities — BusinessPartner and Task:
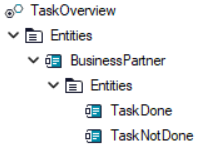
As you can see, there are two different Task entities under BusinessPartner in the data structure named TaskDone and TaskNotDone. The reason is that one entity filters closed tasks and the other filters tasks whose status is not equal to “Done”, meaning they are “New” or “In Progress”.
Filter set and filters
Now we need to create a filter set for our data structure and add all relevant filters to it.
Since we need to filter tasks by their status and also users (BusinessPartner) by their type, we need to create and add these three filters:
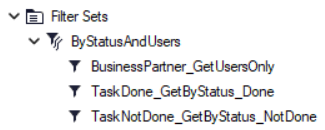
There are two filters related to Task in the filter set — one for open tasks and one for closed tasks. These filters will be used in the screen section used in both tabs. Additionally, there is a filter for users — we need only real users, therefore we filter out all system users without an email address set (UserEmail not equal to null).
To create such a filter set we first need to create the filters GetByStatus_Done and GetByStatus_NotDone for Task, and GetUsersOnly for BusinessPartner.
A filter for done tasks may look like this:
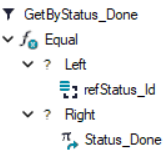
Status_Done on the right side is a constant that you need to create first. More on constants, filters, and filter sets can be found here.
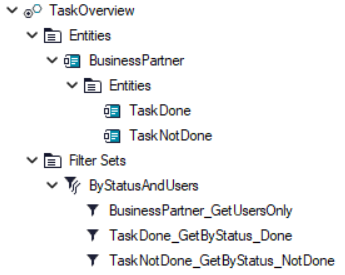
Complete data structure
After adding entities and creating the filter set, this is what the data structure may look like:
Screen sections
Once we have prepared all the data (by creating the data structure) for the screen, we need to create screen sections for it — one for the upper part of the screen and two for the tabs in the lower part.
All three screen sections are based on existing database entities (BusinessPartner and Task). You can simply modify sections for users and tasks if you created them earlier.
User list
The screen section for user selection is very simple — it contains a list of users. You obtain it by filtering all records in the BusinessPartner entity and keeping only those that have an email address set (see here).
The only data field used in our example is the existing default (function call type) field BusinessPartner.FirstNameAndName.
Tasks
In our example we have five columns for each task — Name, Description, Status, Priority, and Due Date. However, you can add more metadata, such as when each task was created (RecordCreated), by whom (RecordCreatedBy), or when it was last updated (RecordUpdated).
Since this screen should be used only for viewing tasks, remember to deactivate buttons for creating new items, including duplication, as described in the documentation. Similarly to the user section above, make the entire screen ReadOnly. A tutorial on this can be found here: How to fine-tune the details in your application.
Split screens with tabs
Now you should have everything ready for your split screen and it’s time to create it.
Create a new screen and base it on the data structure prepared in the previous steps. This data structure will provide all the necessary data inputs for the screen.
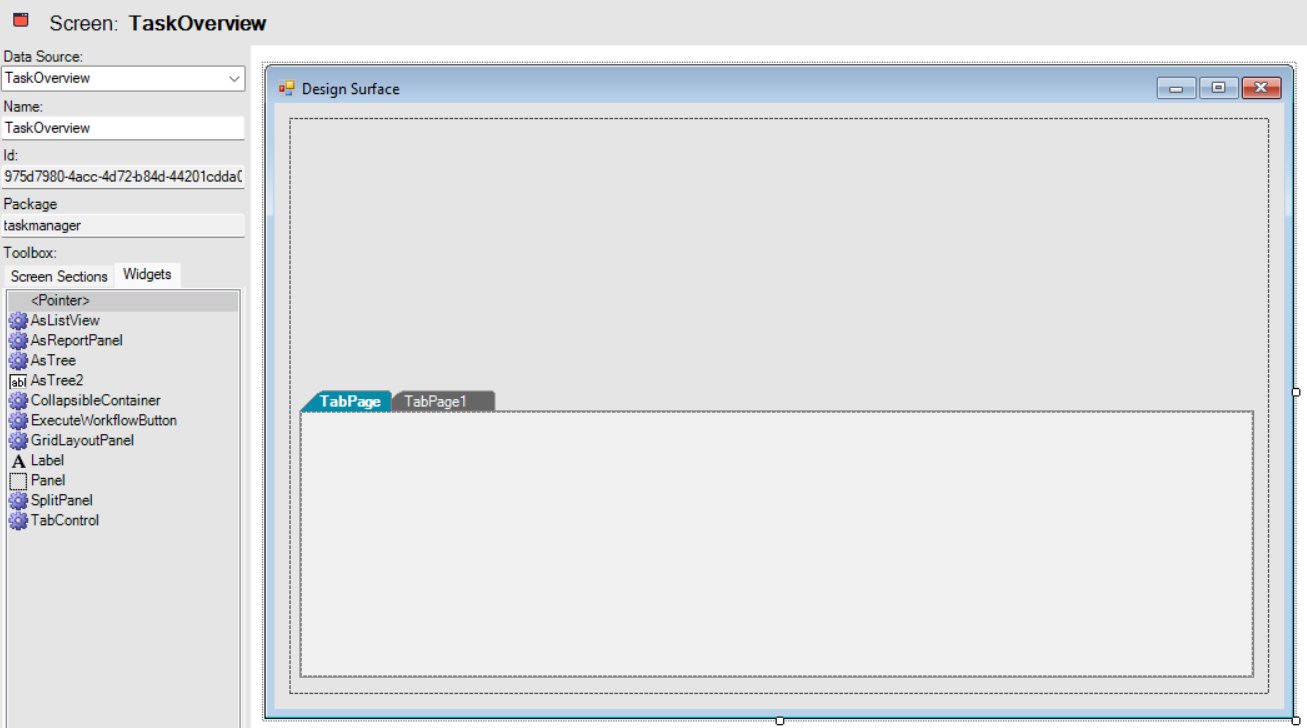
Widgets
Besides screen sections we will use two screen widgets — SplitPanel and TabControl.
First place SplitPanel into your screen and stretch it over the entire surface. It works as a container for the rest of the elements.
Next place the TabControl widget in the lower part of the screen.
This is what you should see:
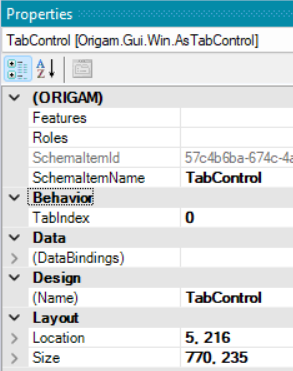
If you want to precisely adjust the size or position of any widget, select it, go to the Property tab in the right panel and modify the Location and Size properties under the Layout section:
Tab adjustments
Now we need to do two things — rename the tabs and change their order.
To change a tab name, click on the tab area you want to rename and modify the Text property under the Appearance section. In this tutorial the first tab is named Open and the second Done.
To change the tab order — we want Open to be first and Done second — we need to work with the SchemaItemName property, which is automatically generated. Tab order in TabControl is based on the name of this property and is sorted alphabetically.
For example, you can name the “Done” tab TabPage1 and the “Open” tab TabPage2 by setting the SchemaItemName property accordingly.
Screen sections
Now you are ready to place the screen sections into the split screen. First place the section with users in the upper part of the split screen, and then place the task sections into both tabs:
Finalization
Before the screen is ready to be used we need to do two more things — create access to it in the menu and apply the filter set from the data structure on which the screen is based.
User access
To make the screen accessible to users we need to create a new screen reference.
You only need to define its name and label (DisplayName), position in the menu (Order), choose the screen to link (Screen), and set one or more application roles (Roles) that will be allowed to access it.
If you create a new application role for it, for example FRM_TaskOverview, you also need to assign this application role to user roles so that certain users can access it. When using the Create Menu Item action, Architect will generate the necessary database script.
Filter set application
The last thing to do is to apply the filters to the screen sections.
First configure the menu item you created and apply the filter set from the screen’s data structure. In the screen reference properties go to Method under the Data Loading section and select your filter set there.
Then click on the screen sections in both tabs and set the DataMember under the Data section to:
BusinessPartner.TaskDoneBusinessPartner.TaskNotDone
The result
After creating the screen according to this tutorial, making it available in the user menu, and adding some sample users and tasks, you will see your split screen in the client application:
By clicking on user names you can see the tasks assigned to them — open or completed depending on the selected tab.
Mission accomplished.
Screens can also be divided vertically, but that is outside the scope of this tutorial.