This guide will walk you through the process of creating user screens based on screen sections.
A user screen in ORIGAM is composed of one or more screen sections, where each screen section serves as a separate “container” for displaying data from one or more different entities.
For example, imagine a partner directory, where one section contains data about the partner (e.g., company name, address, etc.), and another section contains information about individual contact persons and their details (e.g., name, surname, phone, email, etc.).
[!success]- Prerequisites for further work
To follow along, you must meet the following five basic prerequisites:
- Running database server
- Running ORIGAM Server
- Project created in ORIGAM Architect
- Entities and fields created
- Running client application in your browser
Once these prerequisites are set up, log into the client application using the username and password you created during the project setup.
You can create screens using a wizard (action) or by manually setting them up.
Screen with Action
To create a screen using a wizard, simply right-click on the entity in the Model Browser for which you want to create a screen, then select Actions / Create Screen:

A wizard will then appear:

To create a screen, the wizard will also need to create a screen section and a data structure for it.
In the next step, name your screen and choose the fields you want to include. In addition to the fields you’ve created, default fields that hold meta information (such as who created the record and when) are also included:

In the next step, you will see a summary of what you are about to create:

After clicking Start, your new structures will be created:

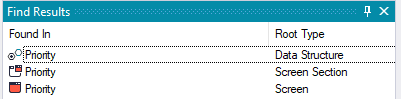
Click Show Result to navigate to the Model Browser under the Find results tab:
You can then click on any of the created items, which will take you to the Model Browser tree where the item is selected (for example, the newly created screen):

Double-click on your new screen to view its details:

In this example, the screen contains just one screen section—the one created by the wizard:

What’s important in the screen details are the Data Source, Name, and the selection of all existing screen sections in the Toolbox:

Screen Section overview
Let’s take a closer look at the screen section the wizard created for us.
Here, you can again see the Data Source, Name, and the Toolbox, which contains all the fields of the entity:

Data Structure overview
The last artifact created by the wizard is the data structure:

Manual procedure
Since screens are composed of screen sections, we need to create those first.
Screen Section creation
In the Model Browser under User Interface / Screen Sections, right-click on the package folder of your application and select New / Screen Section:

In the screen section editor, you must first select the data source for your screen section—choose the entity for which you want to create the screen:

After selecting the data source entity, you will see all its fields in the Toolbox. You can then drag and drop the fields you want to display on your screen.
Form field types will be automatically assigned based on the entity field types:

If you want to change the default field type, select it from the list in the entity tab, go to the Widgets tab in the Toolbox, and drag and drop the desired field type (selecting in one tab and choosing type in another). For example, here we create a ColorPicker field:

In a similar manner, add all the fields you want to display on your screen, adjust their positioning, and save the screen section.
Data Structure creation
Before creating a screen, you must first have a data structure for it.
In the Model Browser under Data / Data Structures, right-click on the package folder of your application and select New / Data Structure:

In the data structure detail editor, name your data structure using the entity or screen name for which you are creating this structure:

Now add an entity to your data structure by right-clicking on its name and choosing New / Entity:

In the detail editor, select the entity you’re interested in:

The name field will be filled in automatically. Save it, and this is what you will see:

The most important part here is the AllFields property. When it is set to True, the data structure includes all fields from the entity. If you only need some fields, set it to False, and you can select the specific fields you require.
You can do this in the Model Browser under Data / Data Structures by right-clicking on the package folder of your application and selecting New / Field:

We won’t dive deeper into data structure composition in this tutorial. For now, you can leave the AllFields property set to True. More information about data structures you find in this article.
Screen creation
Now it’s time to create a new screen using your previously created data structure and screen section.
In the Model Browser under User Interface / Screens, right-click on the package folder of your application and select New / Screen:

As the first step in the screen editor, choose the data source for your screen:

Now, drag and drop your screen section from the Toolbox onto your screen:

Save it, and your screen is ready.
You can create screens with multiple screen sections, but we won’t cover that in this tutorial.
Element Properties
Whether you’re creating screens manually or using the action wizard, it’s useful to know how to modify the properties of individual elements on the screen, i.e., in the screen sections.
All the properties you need can be found in the right bar, under the tab next to the Model Browser called Properties:

Here are some important properties to consider:
Caption: This is the text that appears next to the form element on the screen.Roles: Defines which roles can access this element.Multiline: Set toTruefor textboxes.ReadOnly: If set toTrue, the user will not be able to edit the field.
The Screen Section itself also has its own Properties. Here you can, for example, set whether you can create (ShowNewButton), delete (ShowDeleteButton) and duplicate (HideCopyButton) records:

Once you set these properties as in this example and make the screen accessible for users, they will then see all three buttons in the application:

Other features that you can set here are listed in this text.