This guide demonstrates how to order data records in your tables or forms using default arrow control elements when their sequence is important.
[!success]- Prerequisites for further work
To follow along, you must meet the following prerequisites:
- Running database server
- Running ORIGAM Server
- Project created in ORIGAM Architect
- Entity with fields created
- User screen created
- Running client application in your browser
Once these prerequisites are set up, log into the client application using the username and password you created during the project setup.
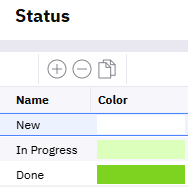
In some scenarios, you may need to order entity data records and display them accordingly. For example, in a Task Manager application, the Status records follow a particular workflow, such as New > In Progress > Done.
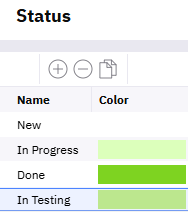
While you might enter the data in this order initially, if you later wish to add a new status (e.g., In Testing), you might want to position it before the final Done state, not after it.
To accomplish this, the most effective method is using the OrderNumber model property, coupled with a corresponding feature in the Client Application. Here’s how to do it.
Model setup
Order field
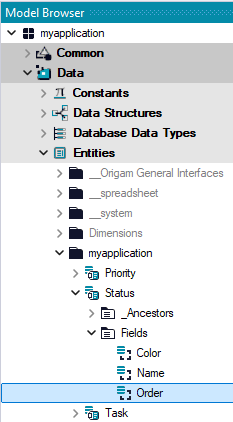
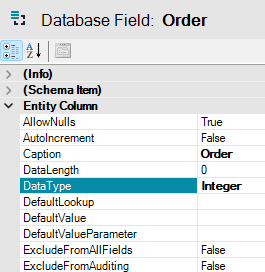
First, create a field in the entity whose records you wish to order. This field will store the correct order of each record. In our example, we create a field named Order for the Status entity.
This field will store integer values, so it must be of type Integer:
Screen Section
Next, enable the ordering feature in the Screen Section where you will edit the records you want to order.
To do this, add the Order field to the relevant Screen Section. In our example, we add the Order field to the Status Screen Section:

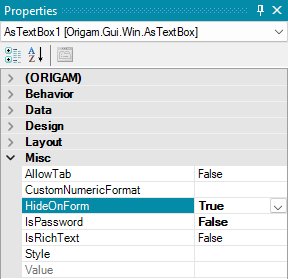
Since we don’t need to display this field on the form, we make it invisible. To do this, go to the Properties tab in the right bar and set the HideOnForm property of the Order field to True:
Save the changes.
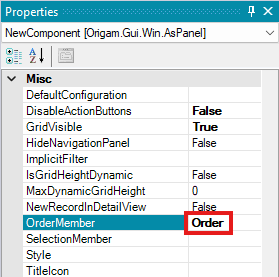
Now, activate the ordering feature in the client application. In the Properties tab of the Screen Section, enter the name of the Order field into the OrderMember property:
Save the settings and restart the server.
The client application
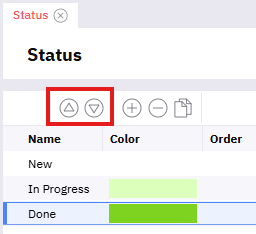
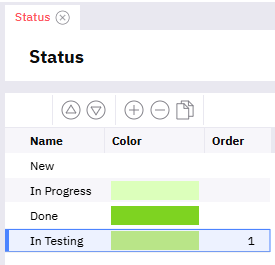
After reloading the client application, a new control element will appear in your Status form:
These arrows can be used to change the order of the data records in your table.
When adding a new record and wanting to adjust its position, use these controls to move it up or down:
The Database
If you start filling out the form with the Order field already in place, the system will begin numbering items from one onward, and all records will have their order set correctly.
However, if you add the Order field later (as in our example), records will start numbering from the newly added item, leaving existing records unordered. This needs to be corrected. The easiest way to fix this is directly in the database. In this example, we will use Azure Data Studio.
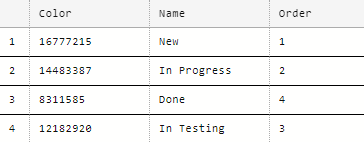
In the dbo.Status table, modify the order values as follows:

Change it to:
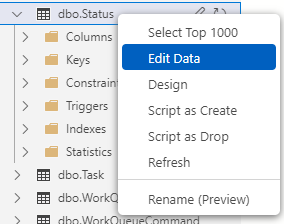
In Azure Data Studio, you can edit the data directly in the table view. Right-click the table name, select “Edit Data,” and modify the order numbers:
If you want to make changes in multiple instances, for example also in production, you need to make an update script for all those changes.
The final result
Once the order numbers are updated and correct, you can sort the records by the Order column and view them in the correct order:
