This article will show you how to create new database entities and fields in the ORIGAM Architect and then how to project your work into the application’s database.
An Entity is the most basic part of the Data Model. A database entity maps to a database and represents one database table. Every Field represents one column in the table.
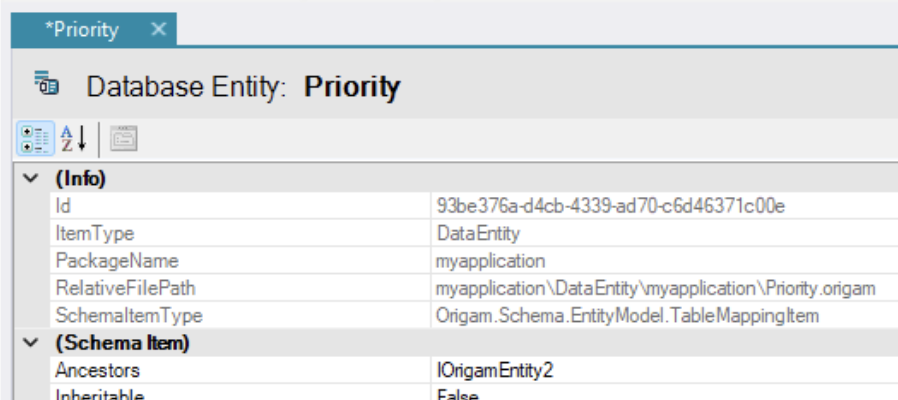
Both Entities and Fields, as well as other objects in the platform, get by default a unique identifier - a long unique hex string named Id:
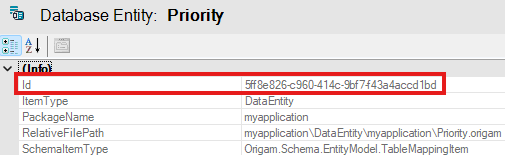
By this Id the records are referenced for example using Foreign Keys.
[!success]- Prerequisites for further work
There are two basic prerequisites you need to meet:
Database entities
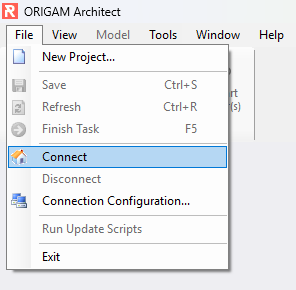
First, connect to your project in the ORIGAM Architect if you don’t have it open:
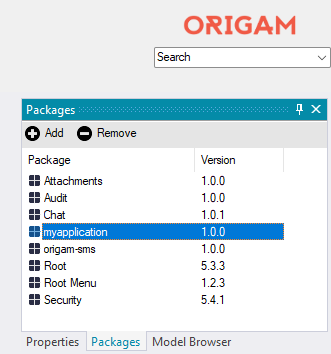
Then open with double-click the package with your application in the Model browser in the tab Packages:
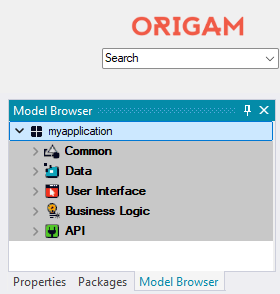
Once you select your package, you will see the main parts of the model:
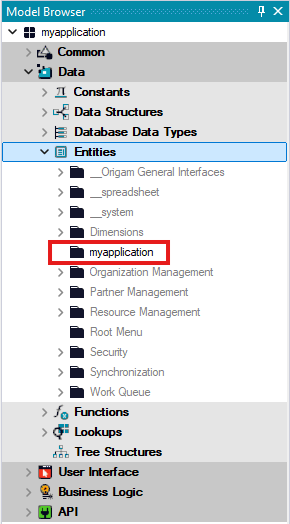
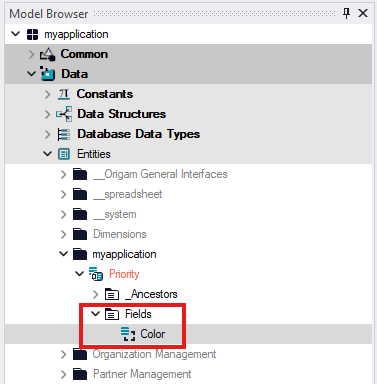
Now open Data and then Entities. Your application is located in a separate package and it also has its own folder with your Entities and Fields:
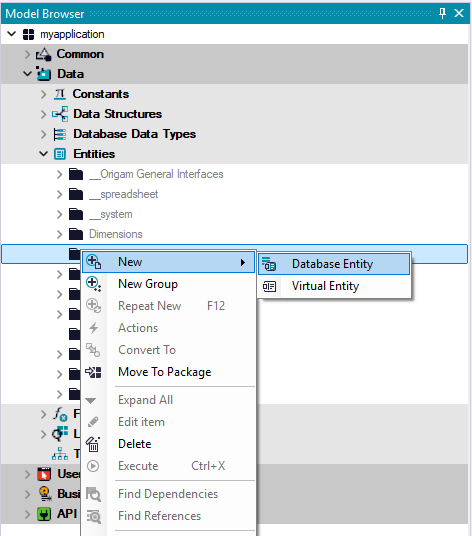
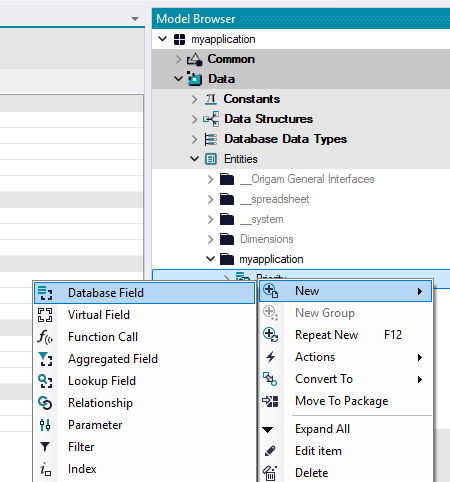
Now right-click on your package entity folder and ask the Architect to create a new Database Entity:
Your new entity will open in the editing panel in a separate tab. What you need to fill in at this moment here is just the entity’s Name and Caption:
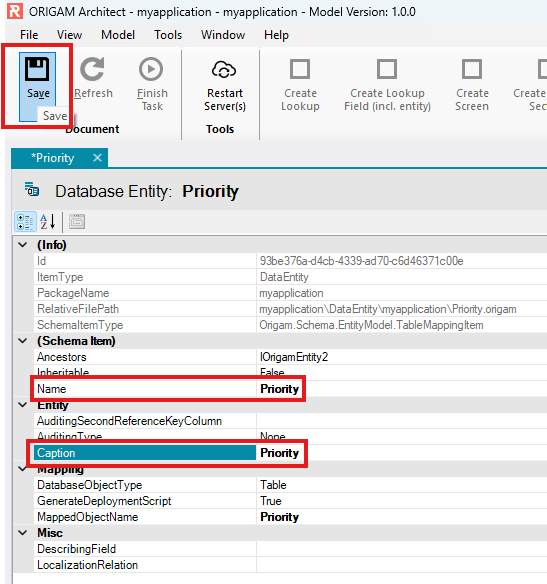
Note that there is a star in front of the name of the entity in the tab heading. That means that you have made changes that aren’t saved yet.
After you click the Save icon in the upper toolbar (or press Ctrl+S), your new entity will be saved, and you can start creating fields for it.
Several attributes have default settings (you can learn more about them here).
Database fields
Once you have an entity created, you can start creating its fields.
Just right-click on your entity and select New Database Field:
In the details of the database field, fill in at least the following items:
- Name
- Caption
- DataType
- DataLength (where needed, for example, by String type)
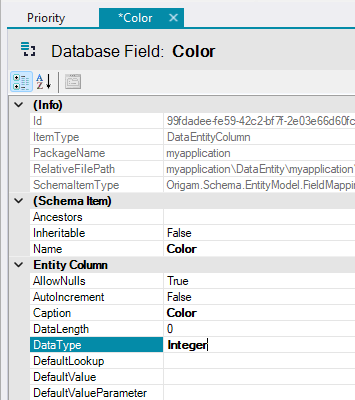
Click on the Save button and your field is created:
In case you are not familiar with basic database field types, then have a look here.
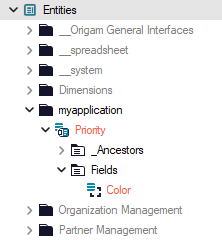
Our convention is that the main field that contains the naming of the entire record is called “Name”:
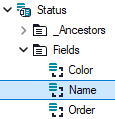
In this case the Name field would contain values like for example: New, In Progress, Done, which will be viewed in drop-down menus when selecting the Status.
Note:
When creating fields for foreign keys ORIGAM uses a naming convention and adds_Id(=Identifier) to the name of the field.
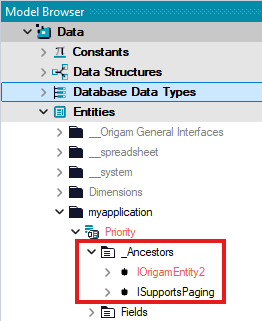
Also note that you have automatically inherited several fields from the IOrigamEntity2, the most notable being the Id field with the globally unique identifier (GUID).
You can find them in the subfolder _Ancestors in the Model Browser:
Versioning
If you are using Git for your project, then you can note that the name of the new entity and its field is in red. This means that the change you made is not yet saved in a Git version.
Once you save a new version in Git, the names of entities and fields will be in black. About how, when, and why to save new versions you can read in this article.
Deployment to database
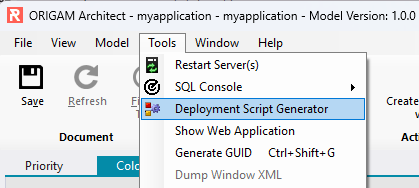
Any new database entities and fields you create need to be reflected in your database. In ORIGAM Architect, this is a two-step process.
First, run the Deployment Script Generator in Menu / Tools:
In the Deployment Script Generator, when using the default filter Missing in Database, you should see your new database entity:
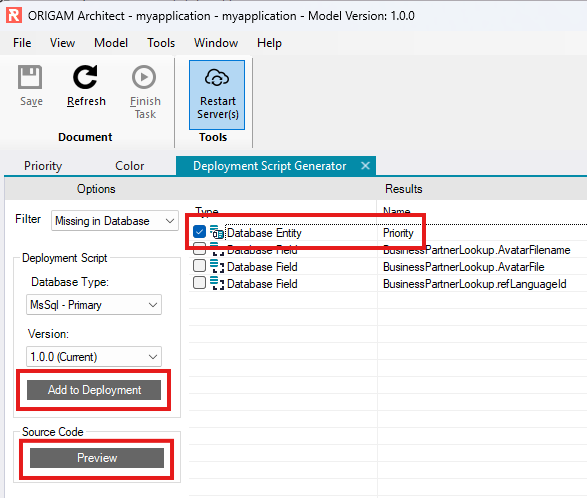
Now select the change(s) you want to reflect to your database.
In case you are interested in seeing the SQL command that the ORIGAM Architect generated for you, click to Preview:
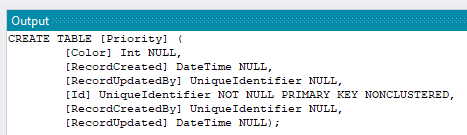
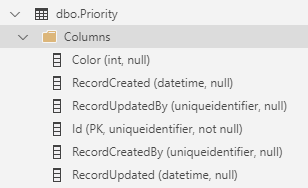
This script will create a new database table including your field(s). The remaining fields like RecordCreated etc. are default fields any entity gets automatically.
When you click Add to Deployment, you will be asked if you want to put the generated items into the search results.

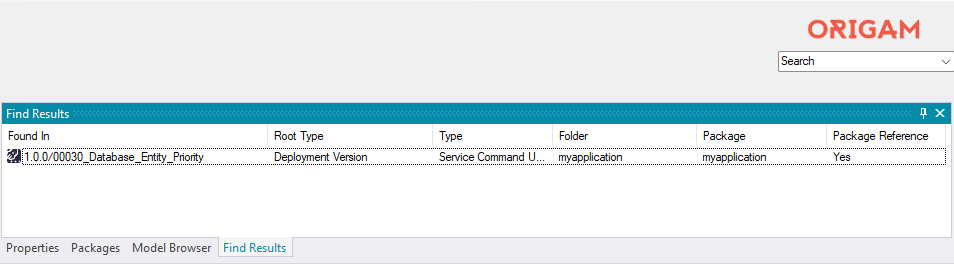
If you choose Yes, then you will see your new script in the tab Find Results in the Model Browser:
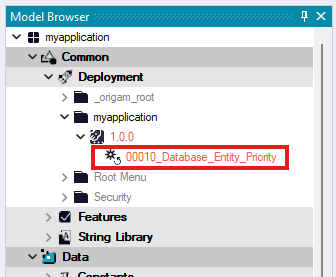
Now just double-click the item you created, and you will be taken to the Model Browser, where under Your package / Common / Deployment / Your application folder, you will see the exported deployment script(s):
In order to run that script and update your database, right-click on it and choose the option Execute:
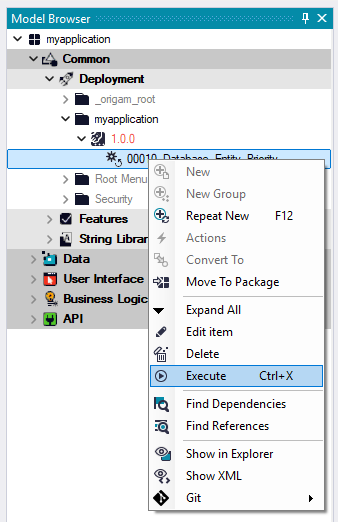
When you do so, the script runs and creates new table(s) and fields in your application database:
How you can check the changes in your database is described here.
More on deployment scripts and the Deployment Script Generator you can find in this article.
And that’s it. This is how you create new entities and fields in ORIGAM Architect and then project them via deployment scripts into your project database, where they are represented by tables and attributes.