This guide will walk you through the process of creating and setting up a drop-down menu in user screens.
[!success]- Prerequisites for further work
To follow along, ensure the following prerequisites are met:
- Running database server
- Running ORIGAM Server
- Project created in ORIGAM Architect
- Entities and fields created
- Lookup created
- User screen created
- Running client application in your browser
Once these prerequisites are set up, log into the client application using the username and password you created during the project setup.
A drop-down menu can be created either via a wizard (action) or manually. In both methods, at least two entities need to be created: the main entity, where you will use the drop-down menu to populate one of its fields, and a second entity (auxiliary), which will be used in the drop-down menu to populate the field of the main entity.
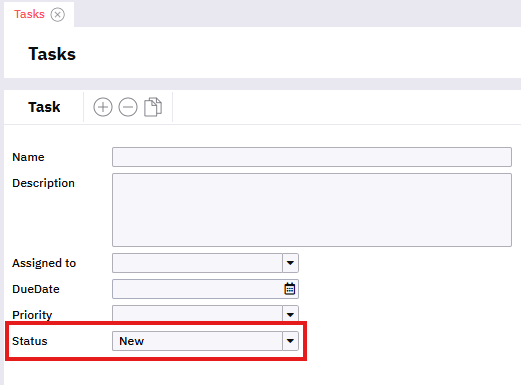
In this example, we will use Task (main entity) and two different entities for the drop-down menus - Priority and Status.
Drop-down menu with Action
Drop-down menus can be automatically generated with the New Screen Action. To make this work, the following four prerequisites must be met:
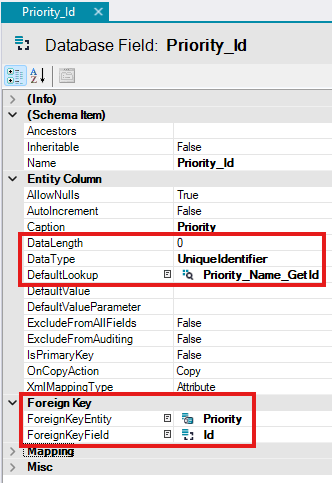
- The main Entity contains a Field that references the Id of another Entity using
ForeignKey. - The
DataTypeof this Field is set toUniqueidentifier, withDataLength= 0. - The auxiliary Entity has a Lookup defined.
- The main Entity has the
DefaultLookupproperty set to that Lookup.
In our example, the Task entity has two fields - Priority_Id and Status_id. These fields are set up like this:
If everything is correctly set up, the Create Screen Action will automatically generate a drop-down menu for your application, such as this:
Manual procedure
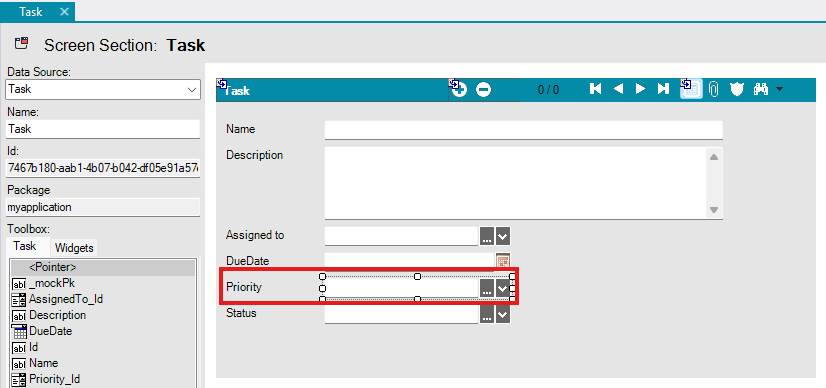
The prerequisites for this method are the same as when using the Action. The only difference is that, when creating your screen manually, you will select the field for which you want to create the drop-down menu from the Toolbox and then assign the AsCombo option in Widgets:
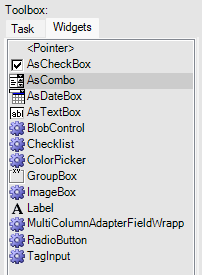
After selecting the Field in the Entity tab, switch to the Widgets tab, and drag and drop AsCombo onto your screen. This will create your Field with the drop-down menu.
Item order setup
By default, the items in the drop-down menu are ordered alphabetically. To change the order according to your custom criteria, follow these steps:
Choose the Data Structure
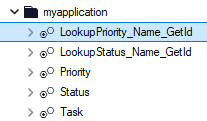
Go to the Data Structure used in the Lookup for your drop-down menu.
In our example, it is named LookupPriority_Name_GetId. There is also a Data Structure named Priority, but that is related to the Data Entity, not the Lookup:
Create a new Sort Set
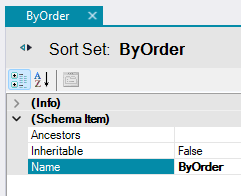
Right-click on the Data Structure name, select New / Sort set, and name it something like ByOrder:

Add Fields to your Sort Set
Right-click on the newly created Sort Set, select New / Sort Field:

Set up your Sort Field
In the Sort Field properties, select the Entity and FieldName according to the data source you want to use for the order:
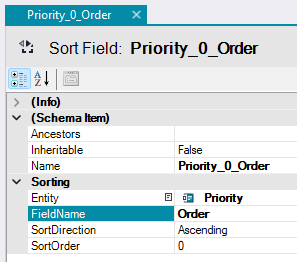
In this example, the items in the drop-down menu will be sorted by the Order field in ascending order. The SortOrder field determines the sorting priority if multiple sorting columns are used. For more information, refer to this article.
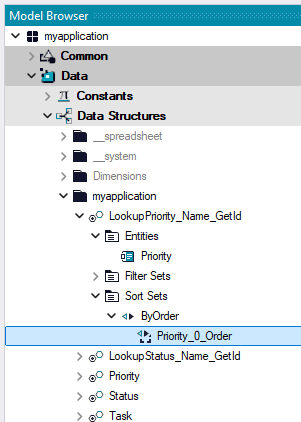
Here you can view your new Sort set in the Model Browser:
If the field you want to use does not appear in the FieldName options, you need to add it to the Data Structure used in the Lookup associated with your drop-down menu. Alternatively, you can set the AllFields field in the Data Structure Entity to True:

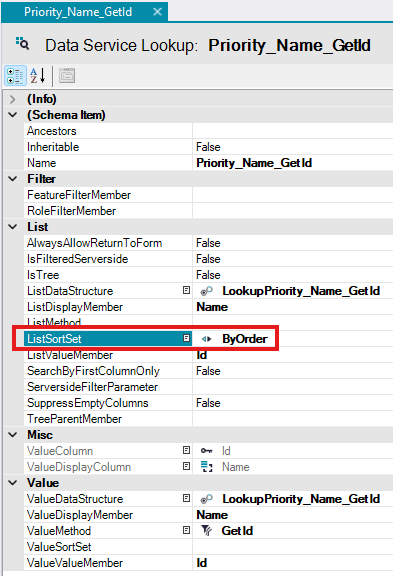
Set up your Lookup
In the Lookup used for your drop-down menu, select the ListSortSet property to use the Sort Set you have created:
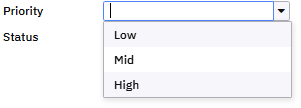
Save your changes, restart the Docker container with your server, and your drop-down menu will now be ordered according to the settings you applied:
Default value setup
If you want the drop-down menu to have a default value automatically set for every new record, follow this procedure. In this example, we will set the Status of any new Task to New by default.
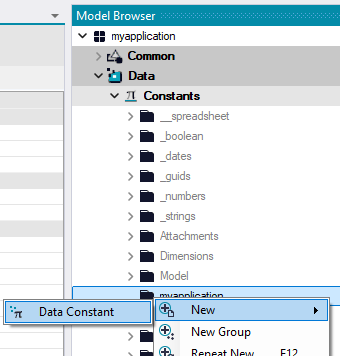
Create a new Constant
In the Model Browser, go to Data / Constants, right-click on the package folder of your application, and create a new Data Constant:
Set up the Constant
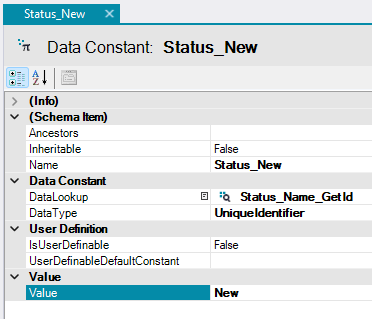
Configure the following properties for the Constant:
Name: Name it “YourEntity_Value” - this is our naming convention for Constants.DataLookup: Select the Lookup related to the entity from which you want to take the value.DataType: For items chosen from existing data, selectUniqueidentifier.Value: Select the value you want to set as the default.
In our example, the Constant settings would look like this:
Save the constant.
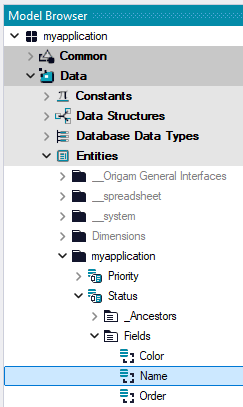
Choose the Field
In the Model Browser, go to Data / Entities, expand the entity fields of your interest under your application’s package folder, and double-click on the field where you want to set up the default value:
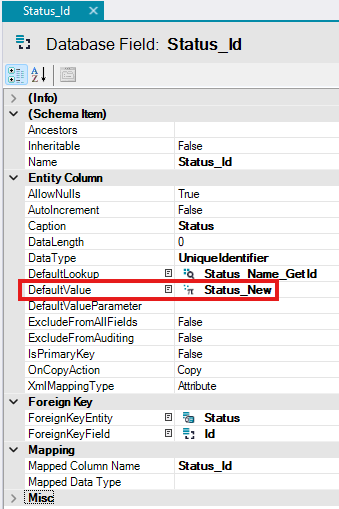
Set up the Field
In the Field details, set the DefaultValue property to your Data Constant:
Save your changes, restart the Docker container with your server, and in the client application, your drop-down menu will display the default value you set: